The ecommerce add-on includes a highly sought-after feature known as the Shopping Cart. This powerful tool is an all-in-one online store, providing a seamless experience for customers to browse and purchase your standard offerings. Its primary purpose revolves around selling your company's products to anyone visiting your store's website. With the Shopping Cart, you can effortlessly showcase your product catalog and enable visitors to purchase, expanding your reach and boosting sales easily.
How to enable ecommerce
To initiate the process of adding the e-Commerce add-on to your shopVOX account, the first step is to reach out to billing@shopvox.com. Send them an email requesting the inclusion of the ecommerce add-on in your account. This will allow you to unlock the powerful features and capabilities of the ecommerce functionality within shopVOX, enabling you to expand your online business presence and enhance your customers' shopping experience.
Creating your Shopping Cart
The shopping cart information for your online store is securely hosted on our shopVOX servers. When you create a shopping cart, you will create a unique URL, which you can then add to your website. The URL is generated from the shop slug field and will have the extension ".shops.shopvox.com". This ensures that customers can easily access and interact with your shopping cart, providing a seamless shopping experience.
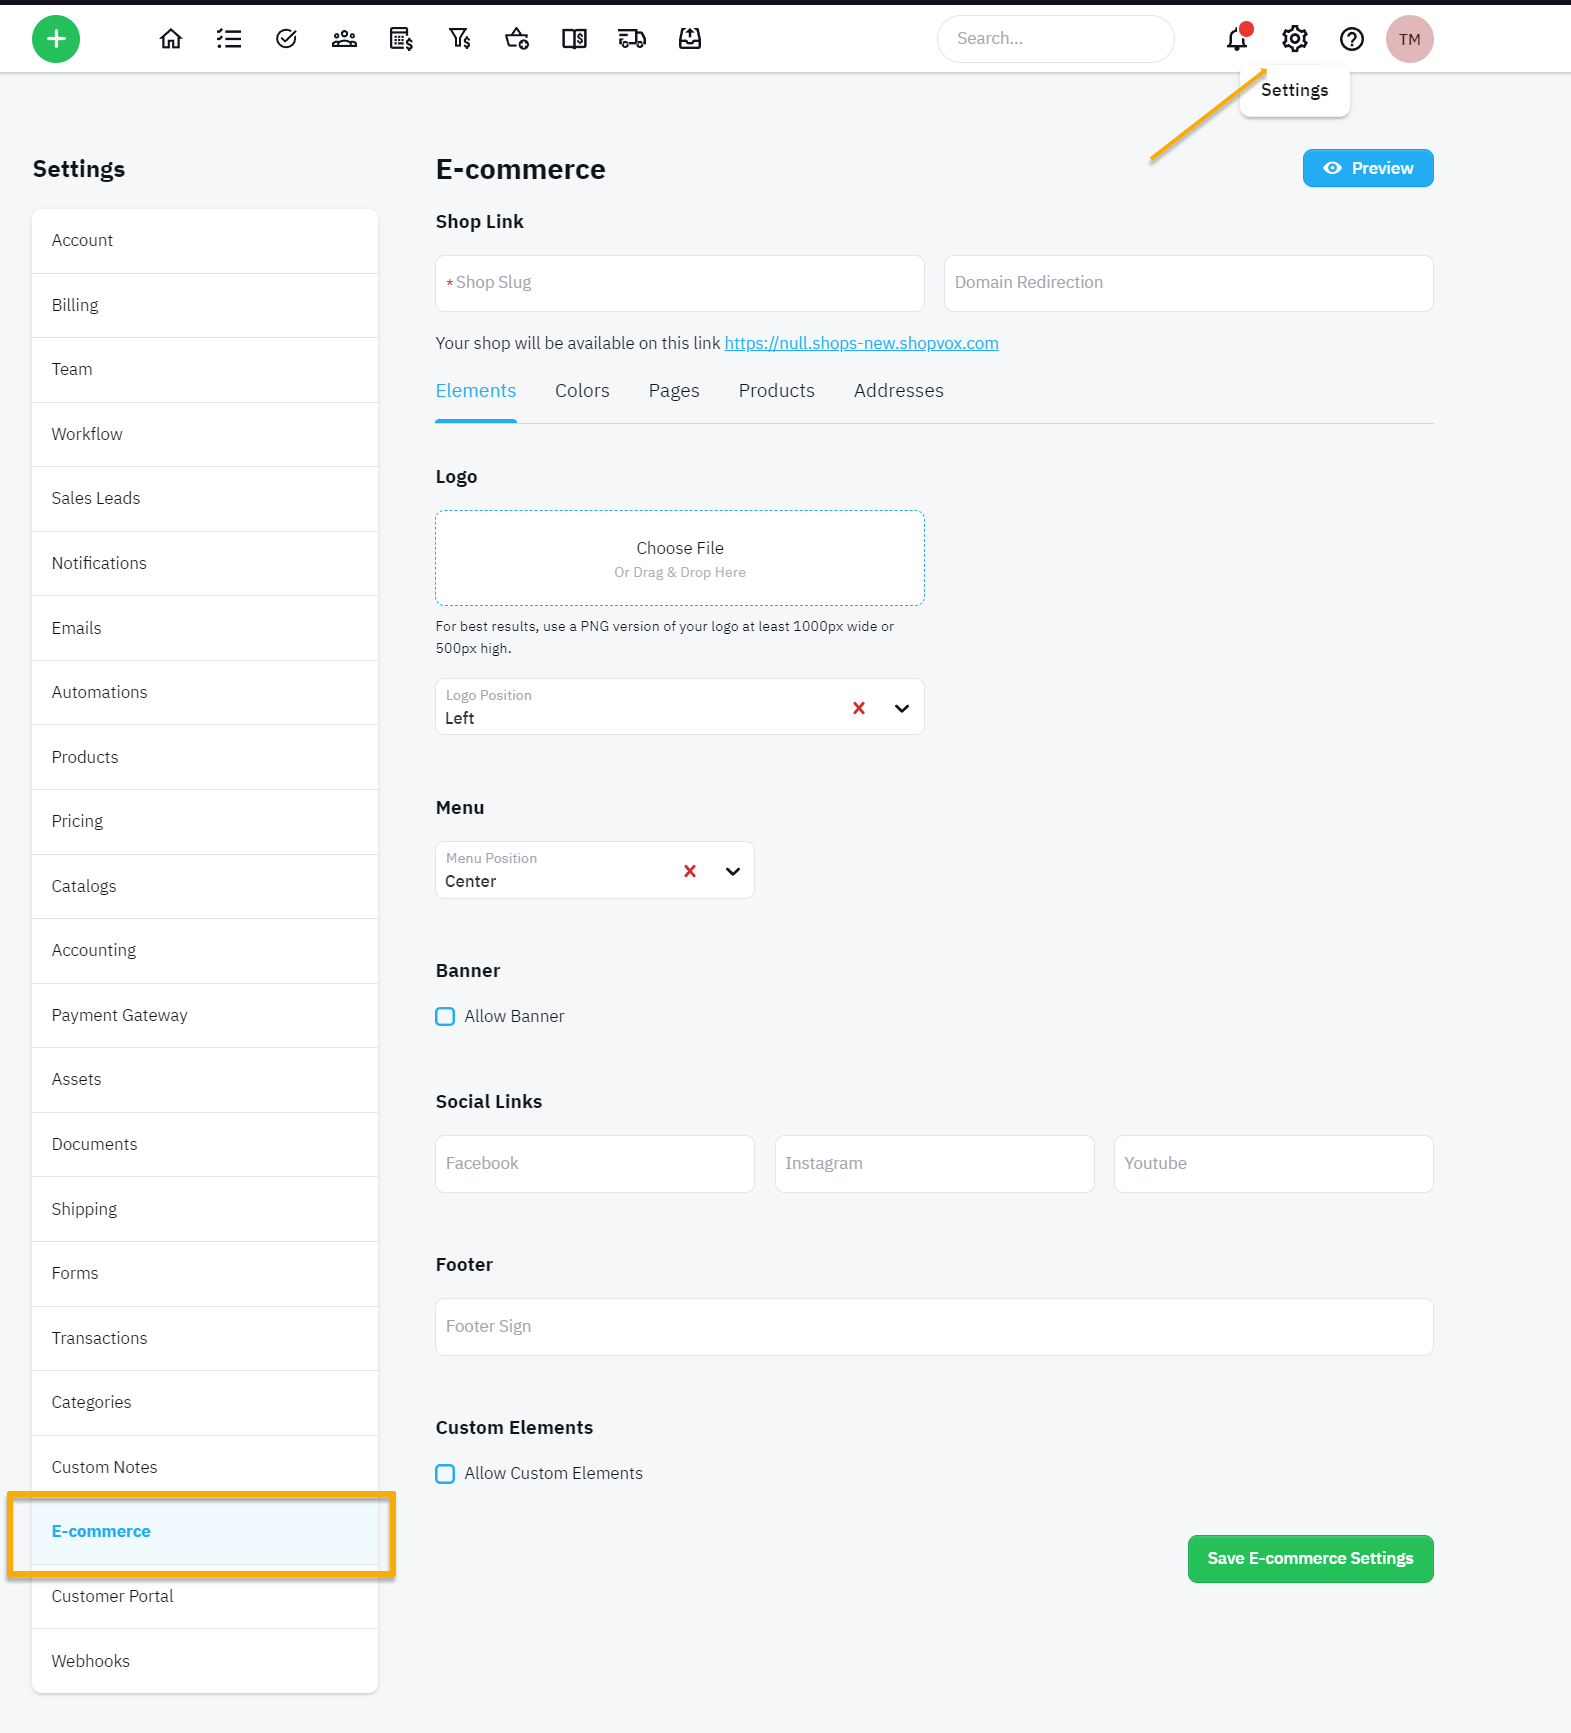
Click on the settings tab on the top right, then go to the E-commerce option on the left side, and let's configure the Shopping Cart
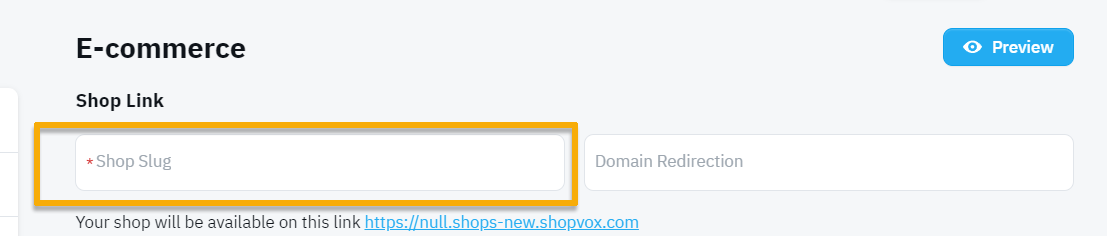
A Shop Slug is the name you will see before the ".shops.shopvox.com", for this example, let's use "cart", then click the green "Save Ecommerce Settings" button
Be aware! Use only lowercase letters with no spaces for your slug. Anything other than that will result in an error
After you save the settings your slug will update, and you can even click the Preview button to see the result, which will be empty for now.
Continuing down the Elements tab you can choose your logo, and logos positions, as well as how the menu is positioned
Note for this example we are leaving all the settings as is but will be uploading the shopVOX logo
Click "Allow Banner" to enable the banner feature, then Add New Banner, to add images with text as your banner
A Banner is the classic Image and text you see on most websites at the top of the page, underneath the header, that helps identify what your brand is. Selecting flattering images, and provide simple text to your customers
Adding banner details is simple. Fill in a Title, Description, Text Position and Font Color. Click Choose File to upload the Image you want to use. Then click save banner. See the example below .
Add in a few images for variety. Its best practice to keep it simple. Less is more, and a good image speaks volumes.
In the example we have added in four images, with Titles, Descriptions, Text position, and Font Color. You can see the previews on screen.
Please note, that the previews are not the exact representation of what you will see on screen. This is because the shopping cart is responsive and will adjust for different screen sizes and devices.
Add in your Social Media Links. We offer Facebook, Instagram, and Youtube
Your social media links, will show up on the bottom right of the footer on the shopping cart page.
A footer, sits at the bottom of the shopping cart. Fill it in with a final message.
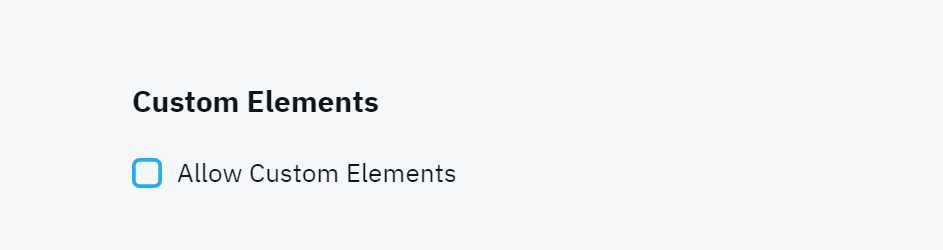
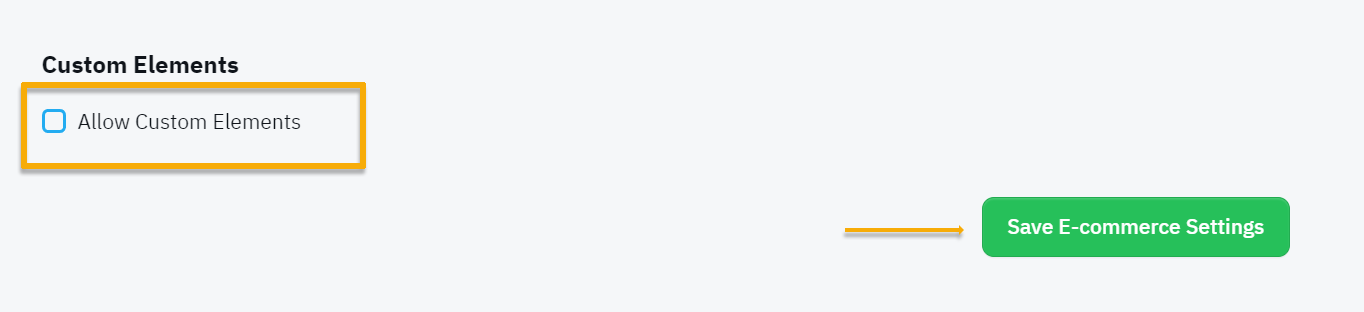
The "Allow Custom Elements" check box, is meant for custom HTML + CSS, and will be covered in a future article. Fill in all your settings in the Elements tab not forgetting to click "Save Ecommerce Settings" before you proceed further.
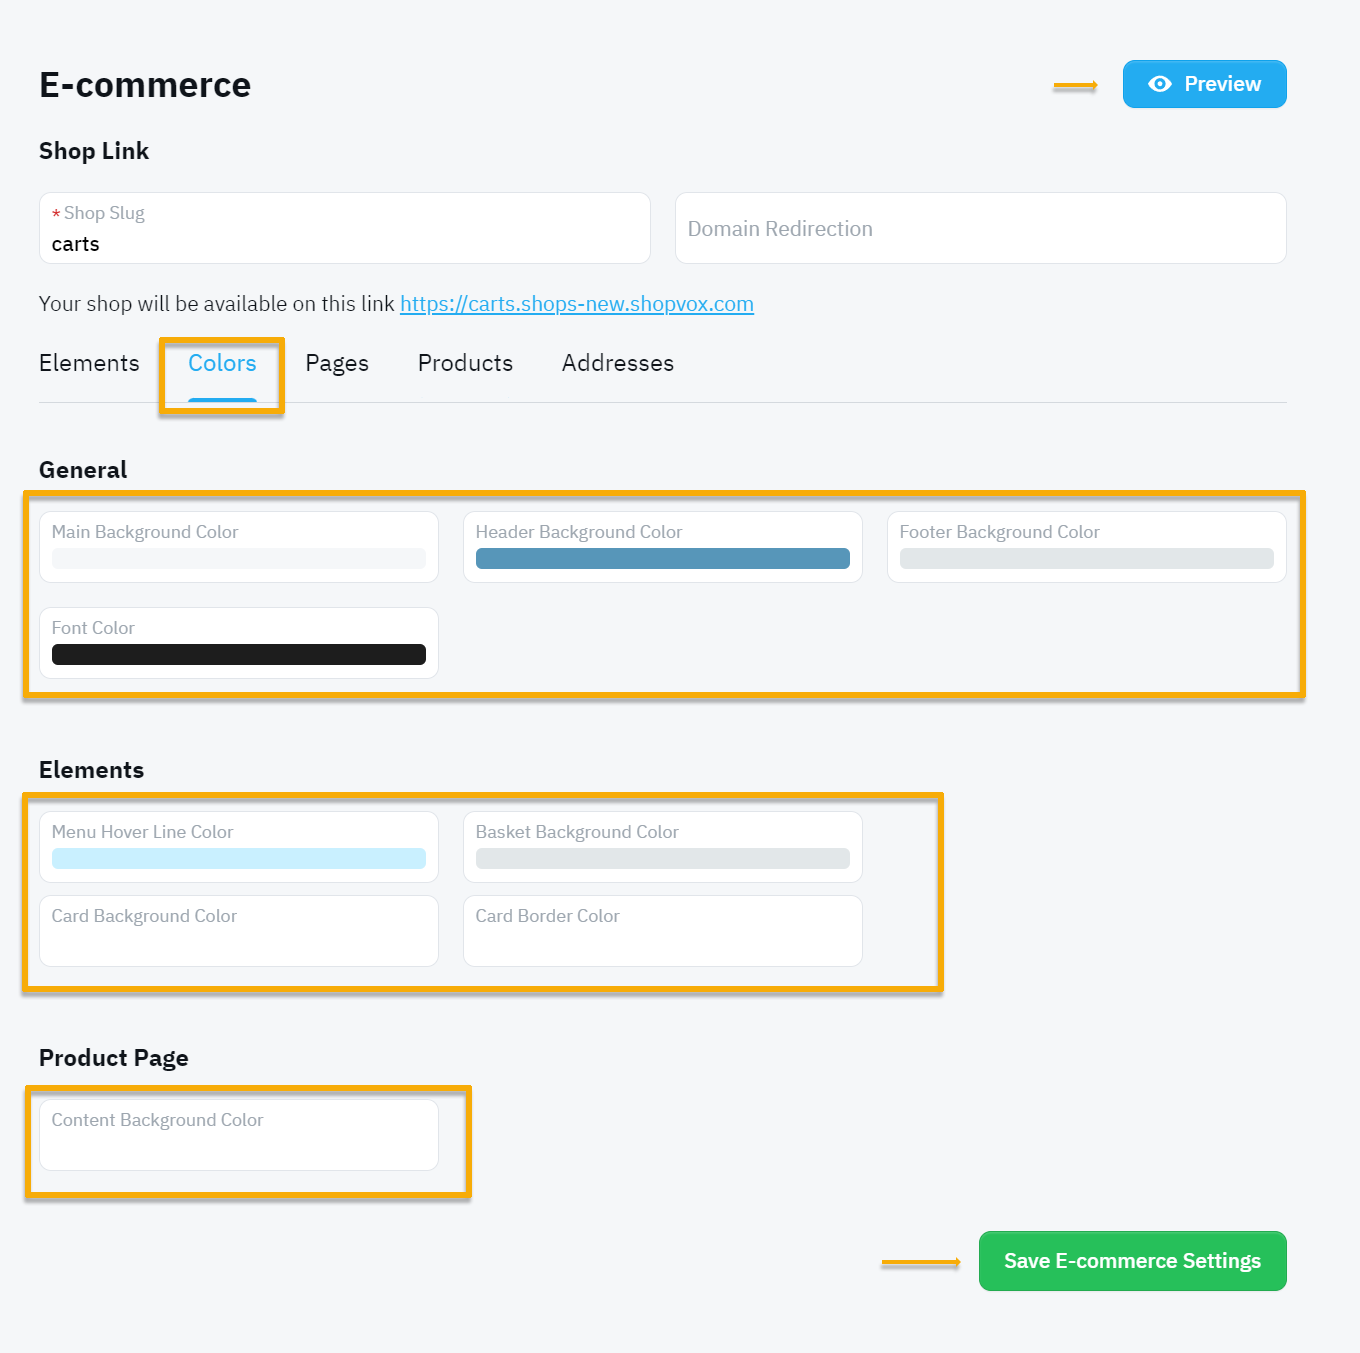
Customize the Colors of the shopping cart. Adjust Main, Header, Footer background colors, as well as other various colors.
Remember when you make changes to the shopping cart, to click "Save Ecommerce Settings" before you Click the blue Preview button
If you haven't already now is a good time to "Preview" the shopping cart by clicking the blue Preview Button, after you have clicked "Save Ecommerce Settings"
Make changes, click "Save Ecommerce Settings" then the blue Preview button regularly to see the final output of your configuration
Adding Products to Your Shopping Cart
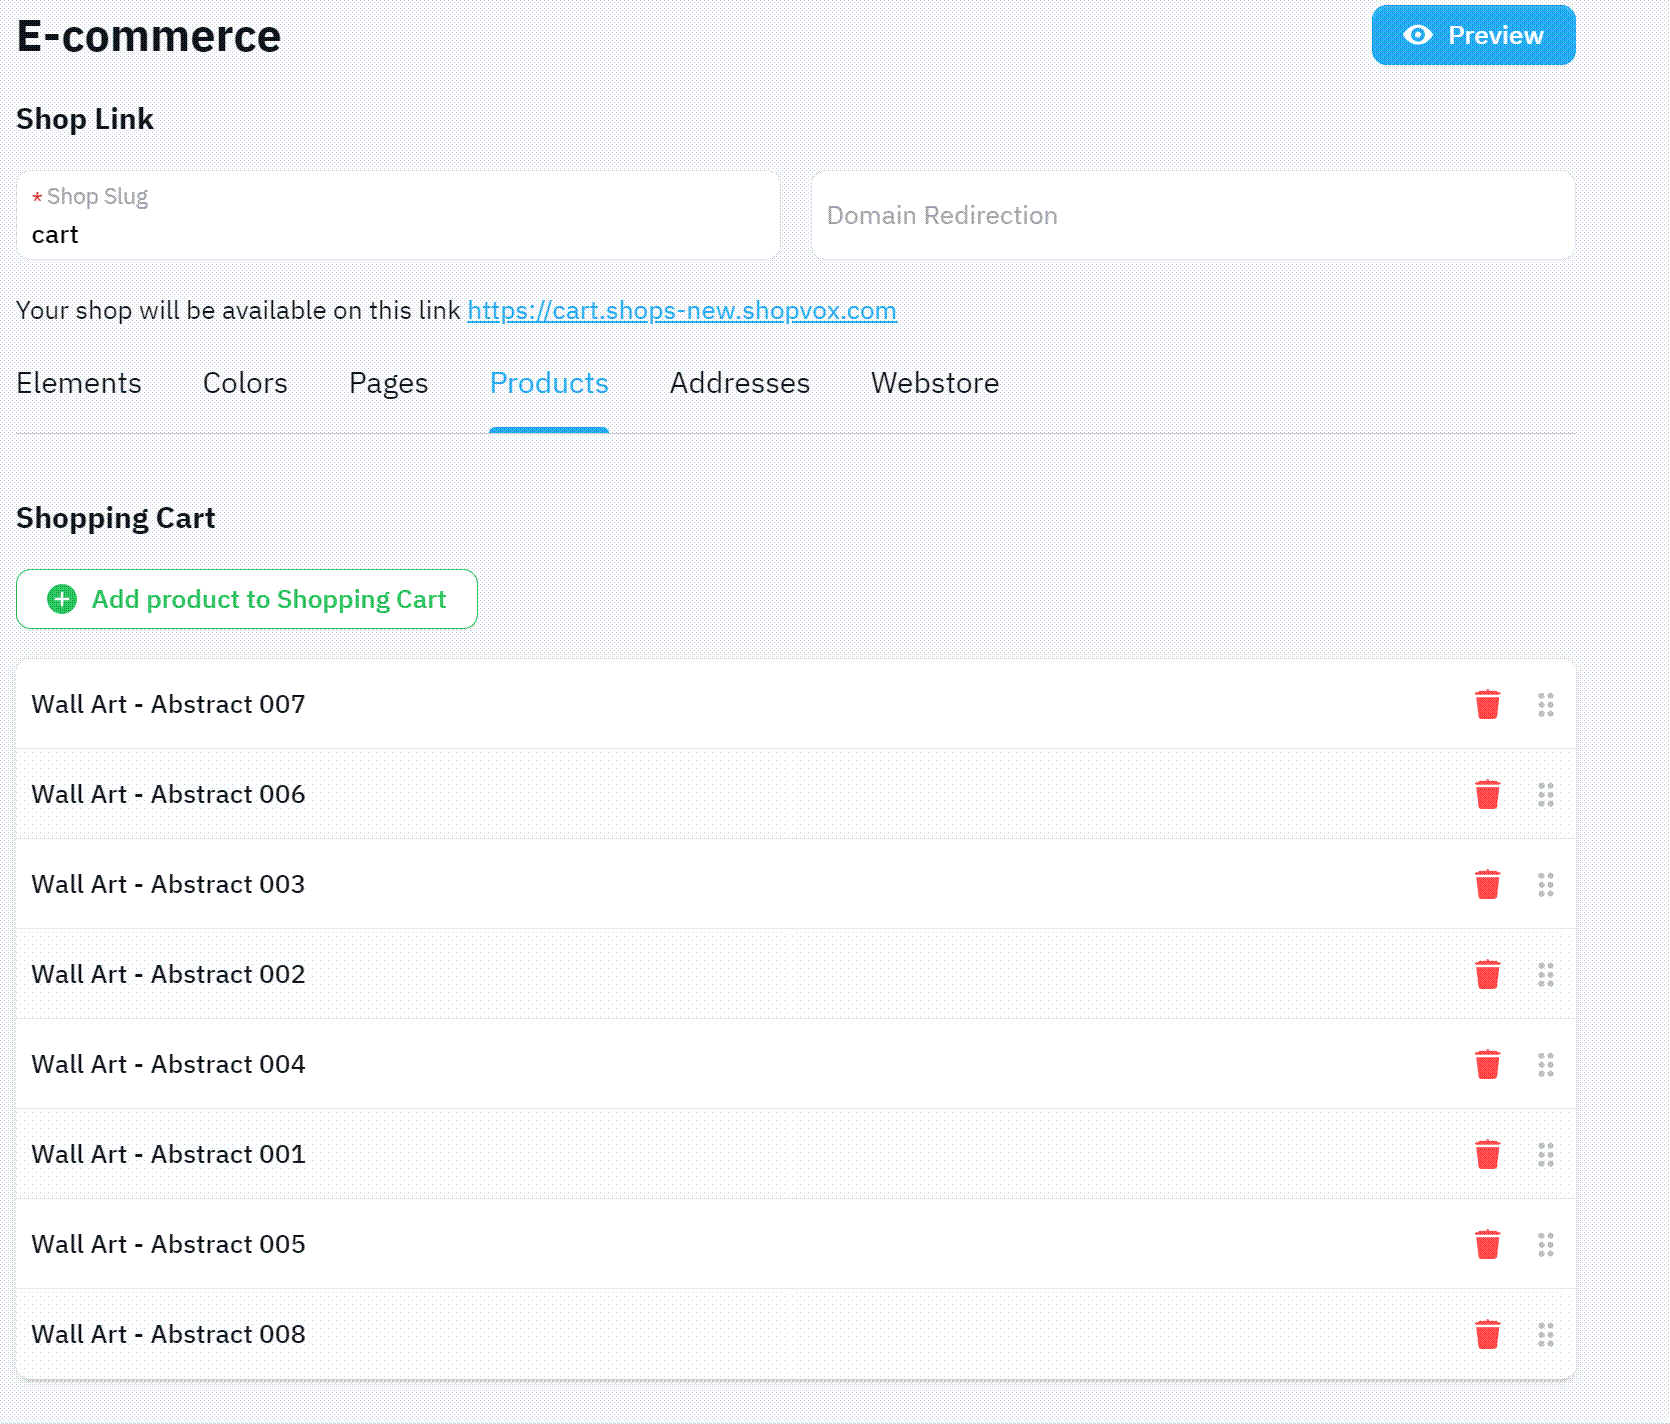
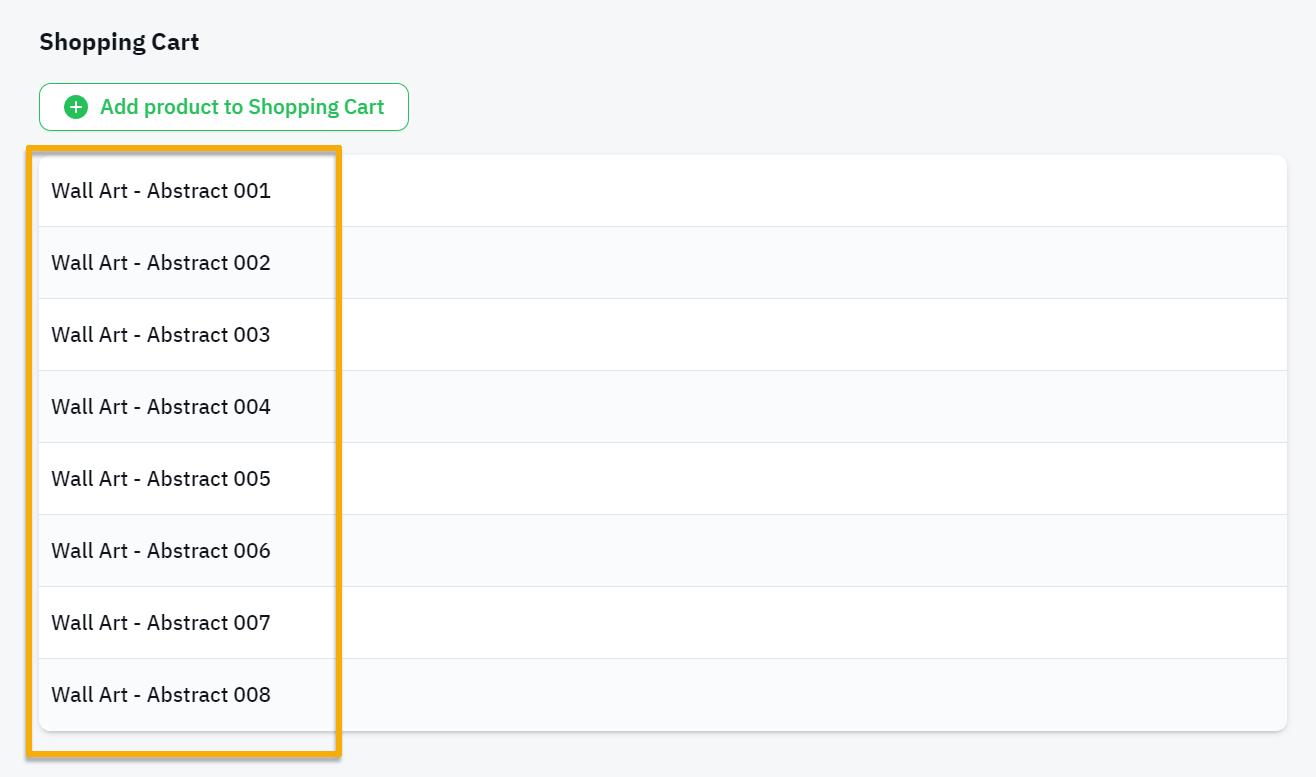
Once the shopping cart setup is complete, it's time to incorporate products for customers to buy. To do this, just navigate to the "Products" tab and add the specific items you want customers to purchase.
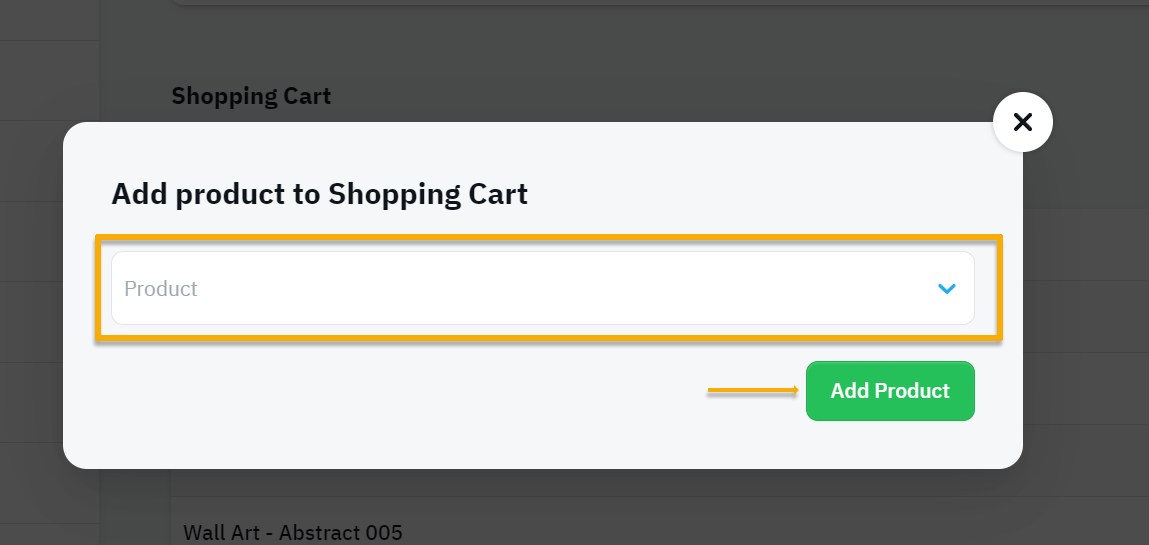
Your Products can be added by clicking on the "+Add products to Shopping Cart"
Then select the Product from the Drop down menu and Click Add Product
For this example, we added eight of the Wall Art - Abstract products
Note: Adding a product to the Shopping Cart will automatically set the shopping cart flag within the Product itself.
Inside a Product that has ecommerce enabled, you will find all ecommerce settings in the Advanced Settings Tab. You can add any Product to the shopping cart from within the product as well as from the Ecommerce screen.
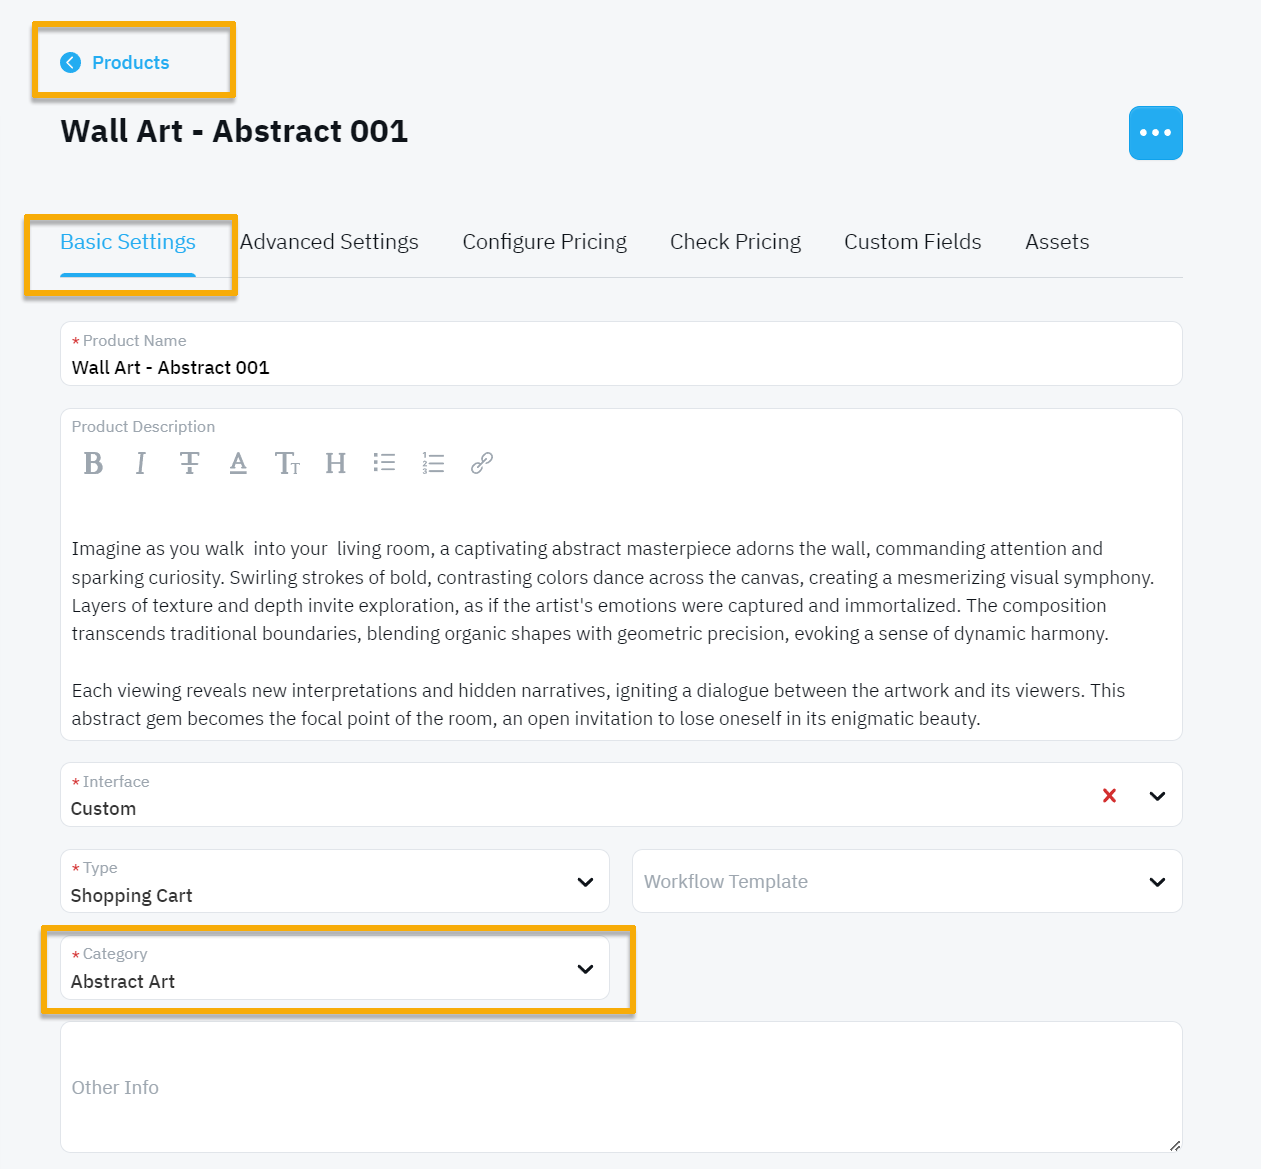
The Category that a product is grouped into, becomes a tab on your Shopping Cart web page. This allows you to control the amount of tabs, and the naming of them.ttt
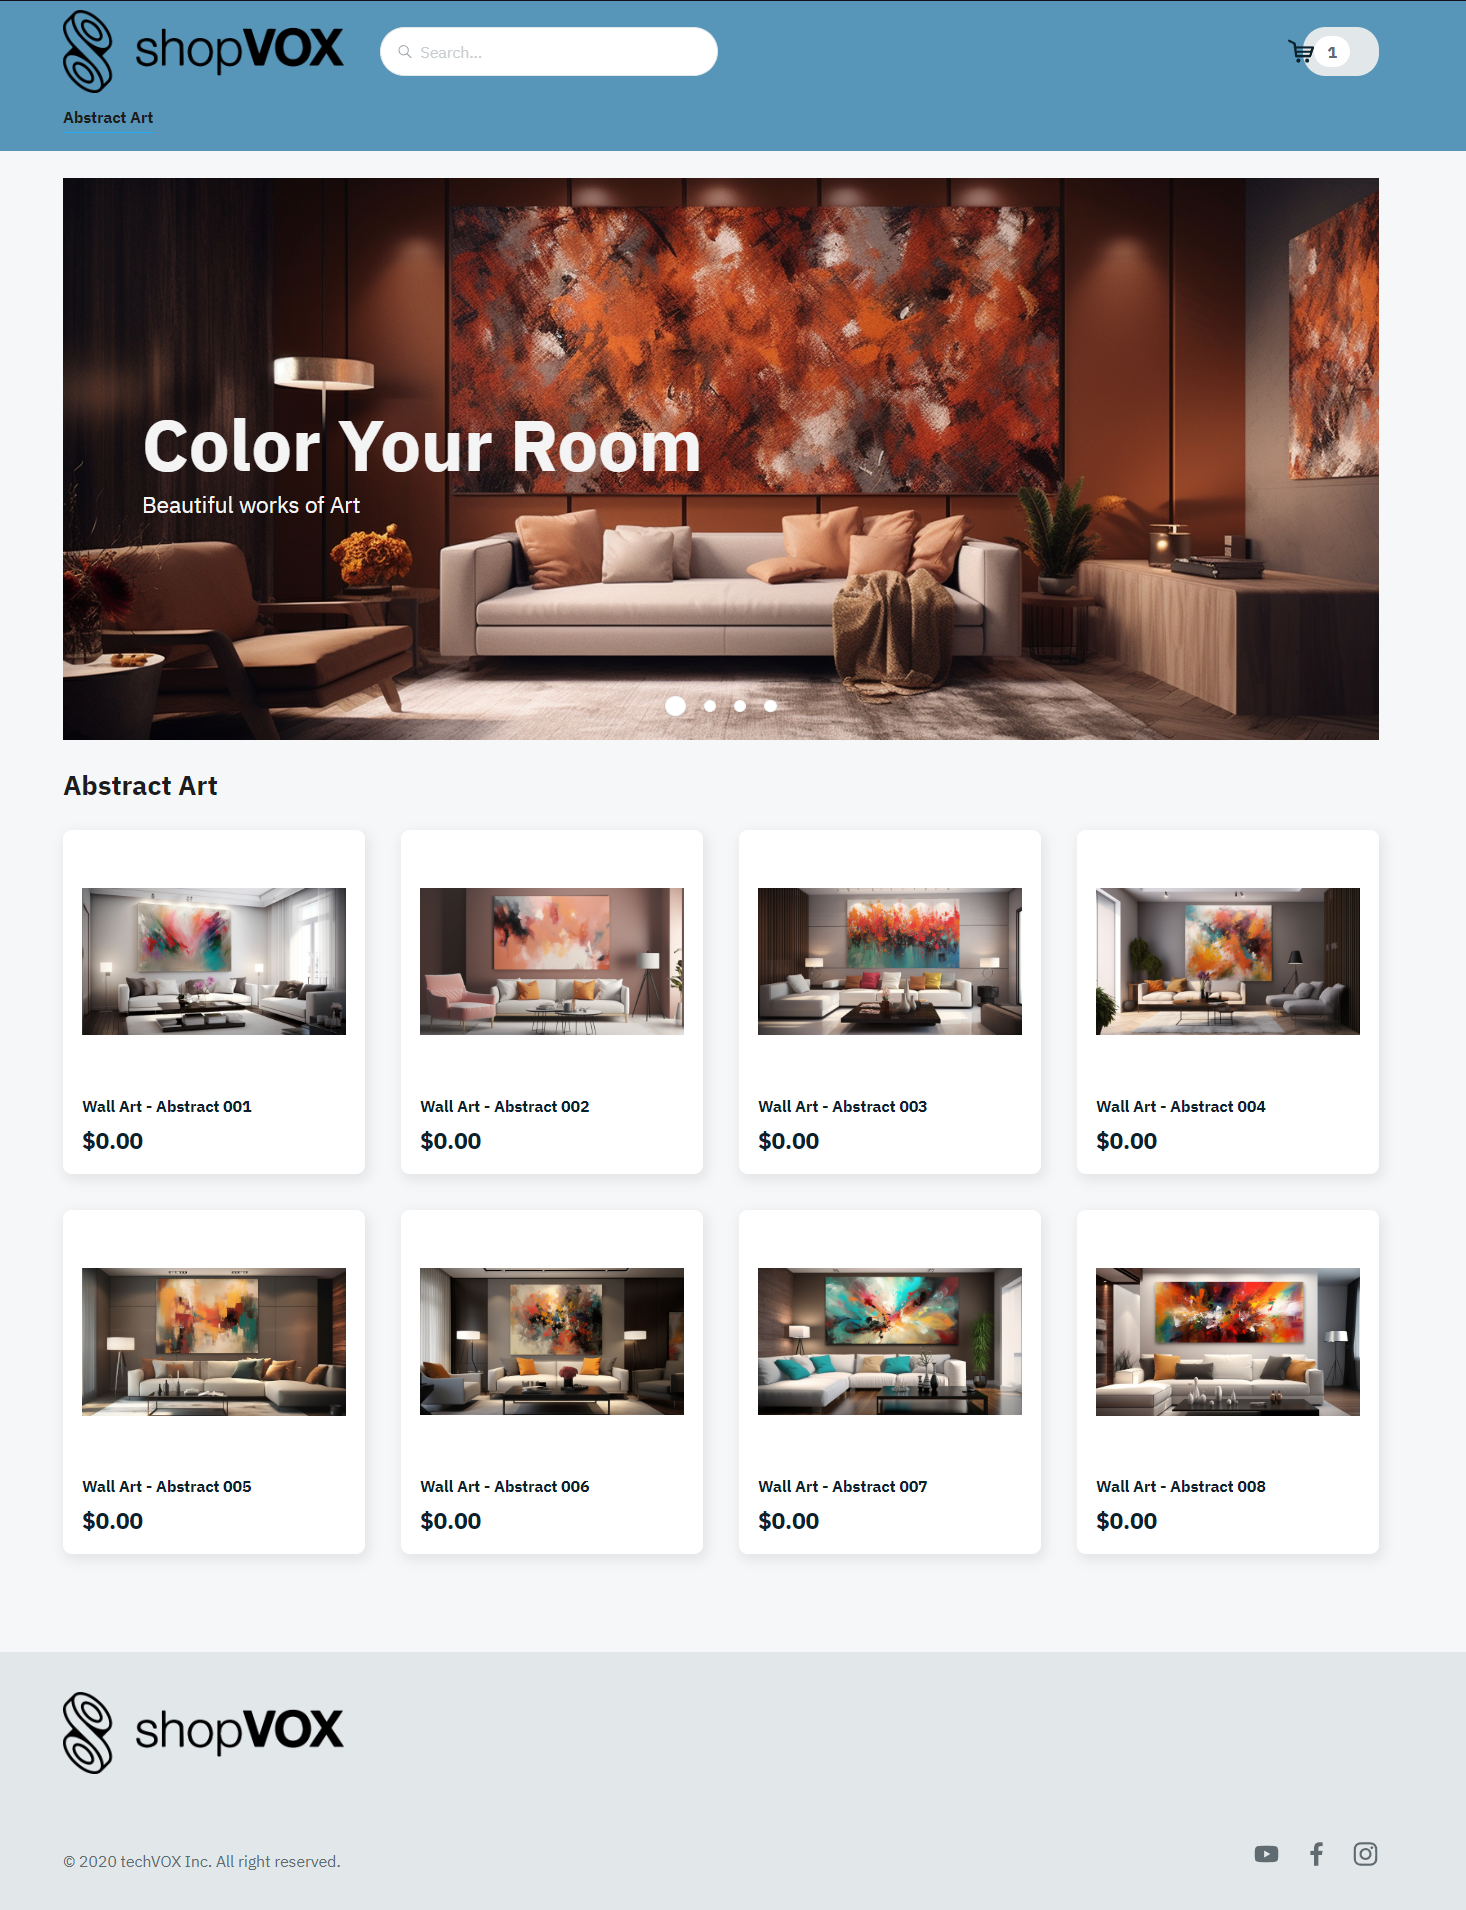
Click Save Ecommerce Settings, and then the blue Preview Button at the top to review our Shopping Cart web page.
With a clean responsive design, you can create beautiful looking Shopping Carts
Clicking on any of the Products will take you to the product order screen. For this example, let's will click on Wall Art - Abstract 001
Its Important to note that the functionality of your Product within shopVOX will remain the same in the Shopping Cart, regardless of how it is built.
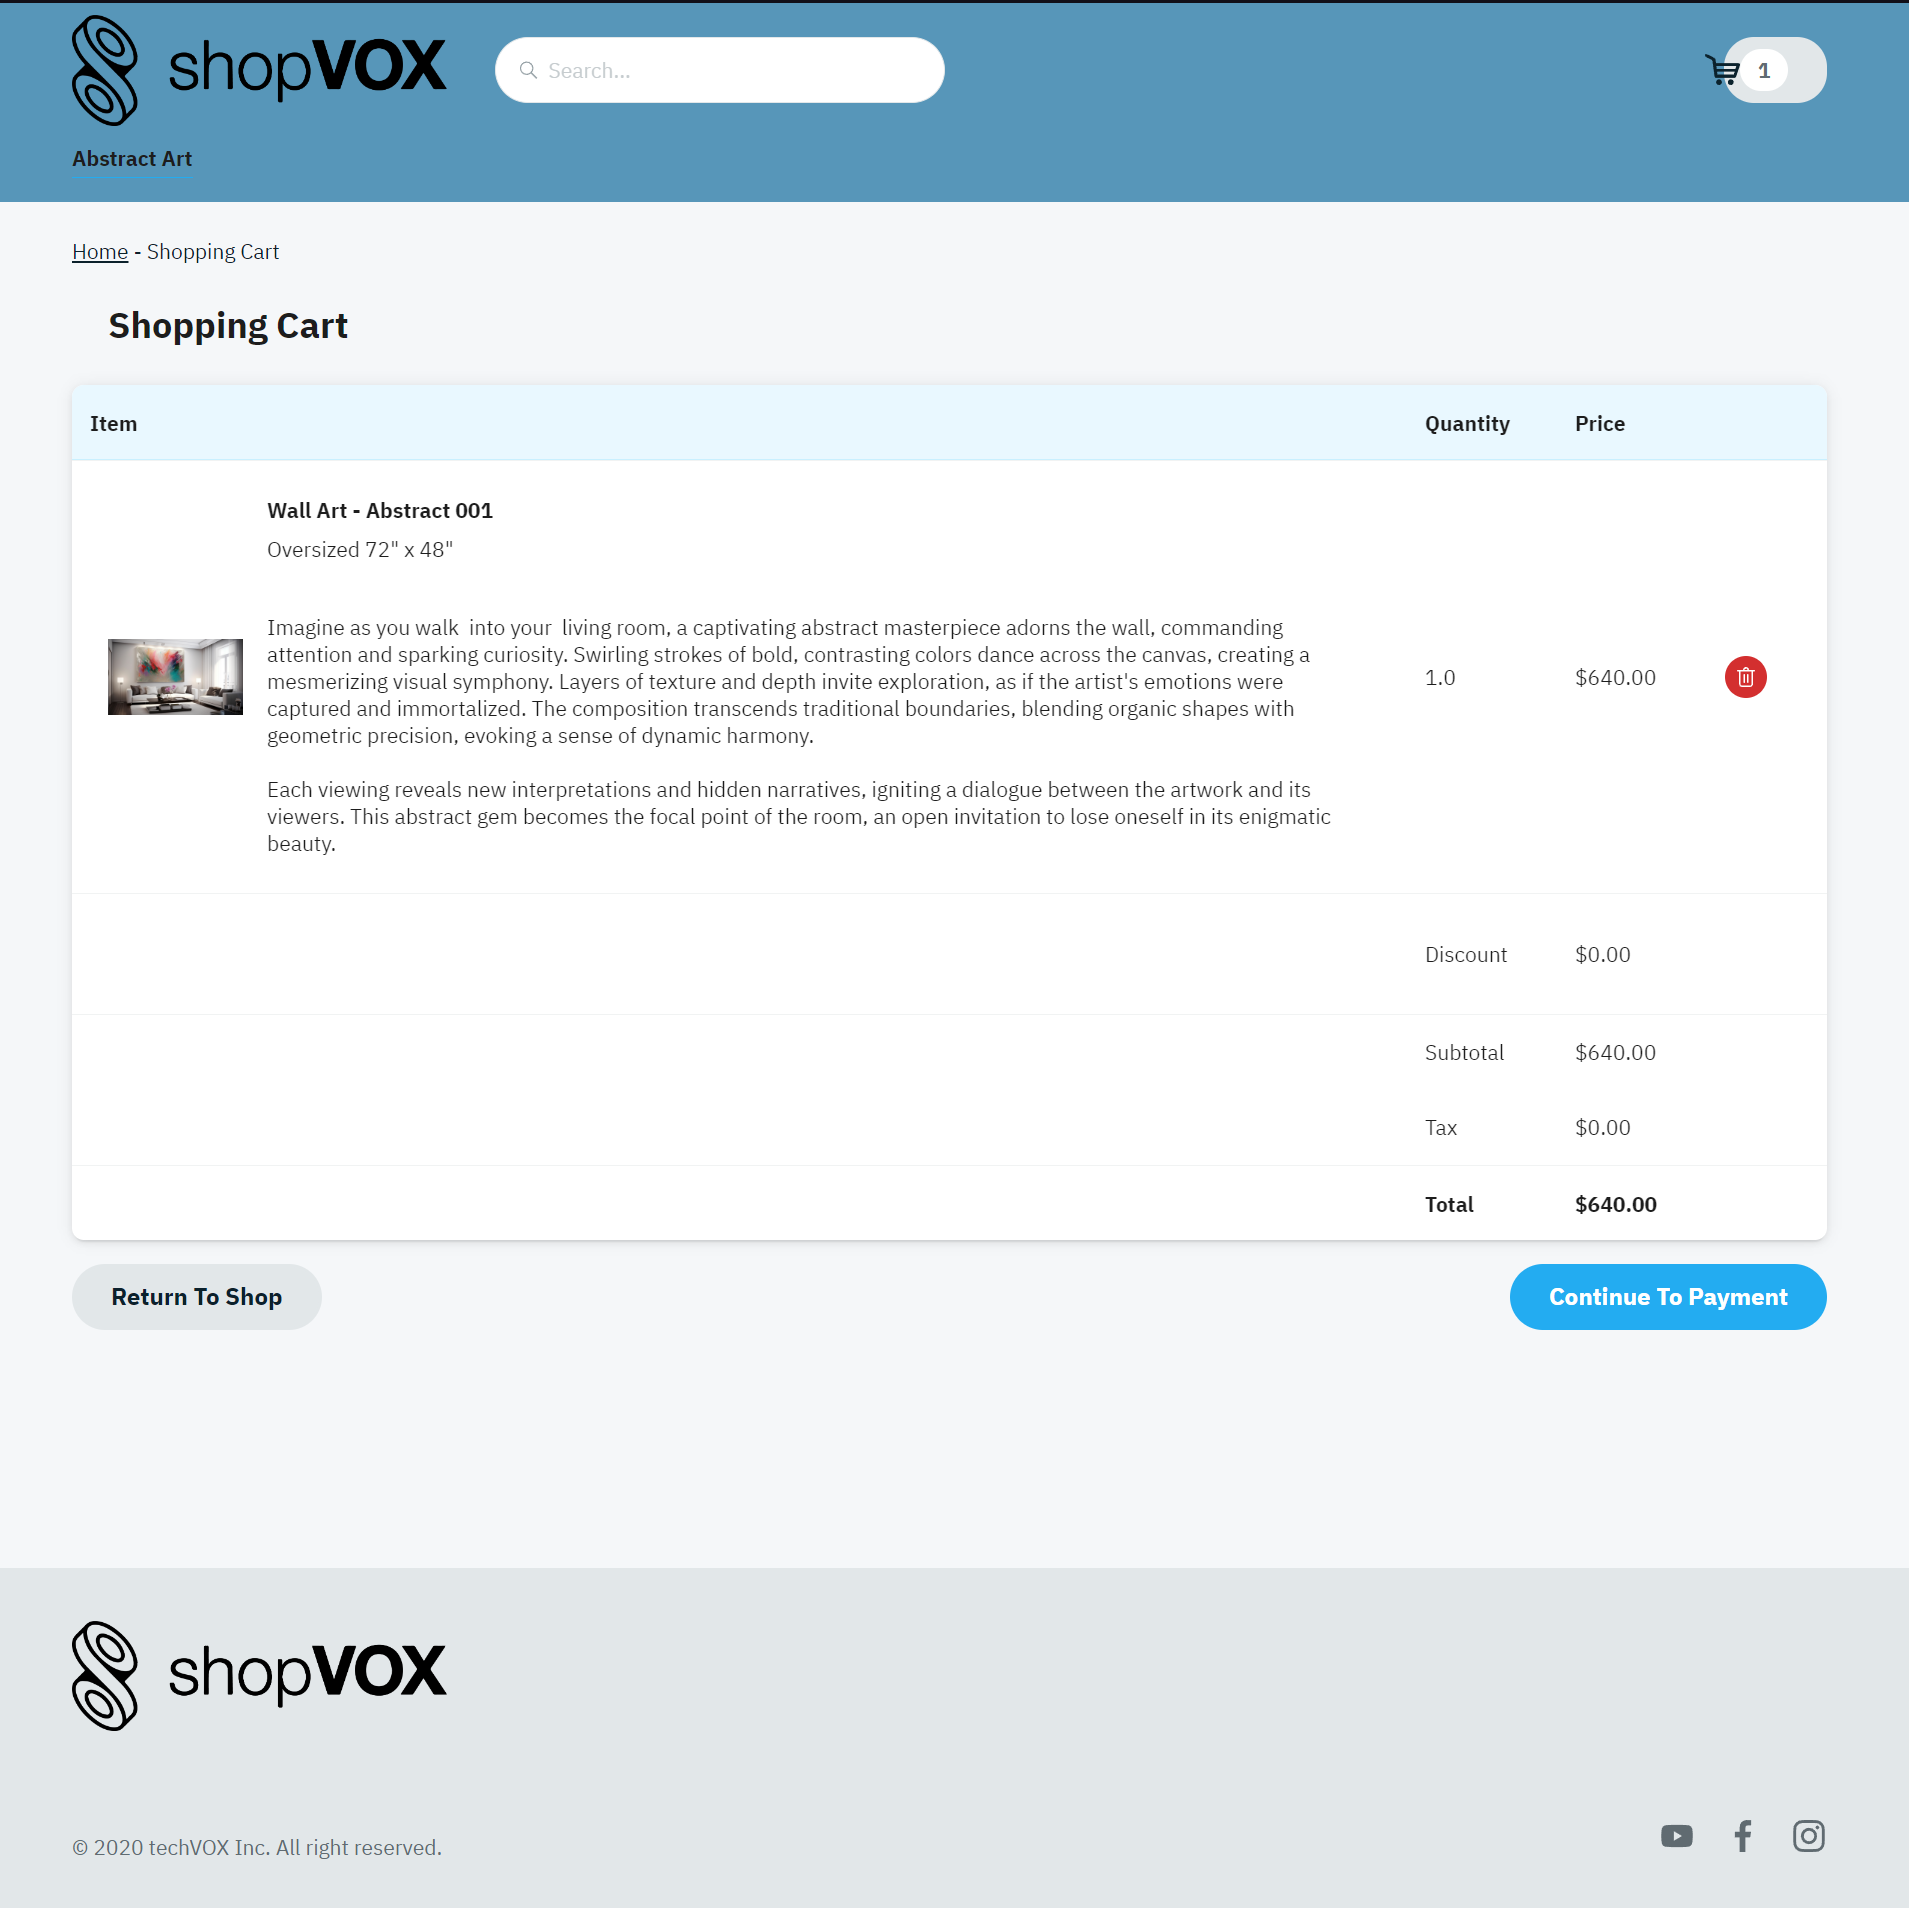
After selecting a Product from the Shopping Cart, choose Size, Material, Frame, and Hardware options, which determine the Price. Clicking "Add to Cart" allows us to view the order in the Shopping Cart by clicking on the shopping cart icon located at the top right of the header.
This is how the order looks in the shopping cart. Next, we will click "Continue To Payment"
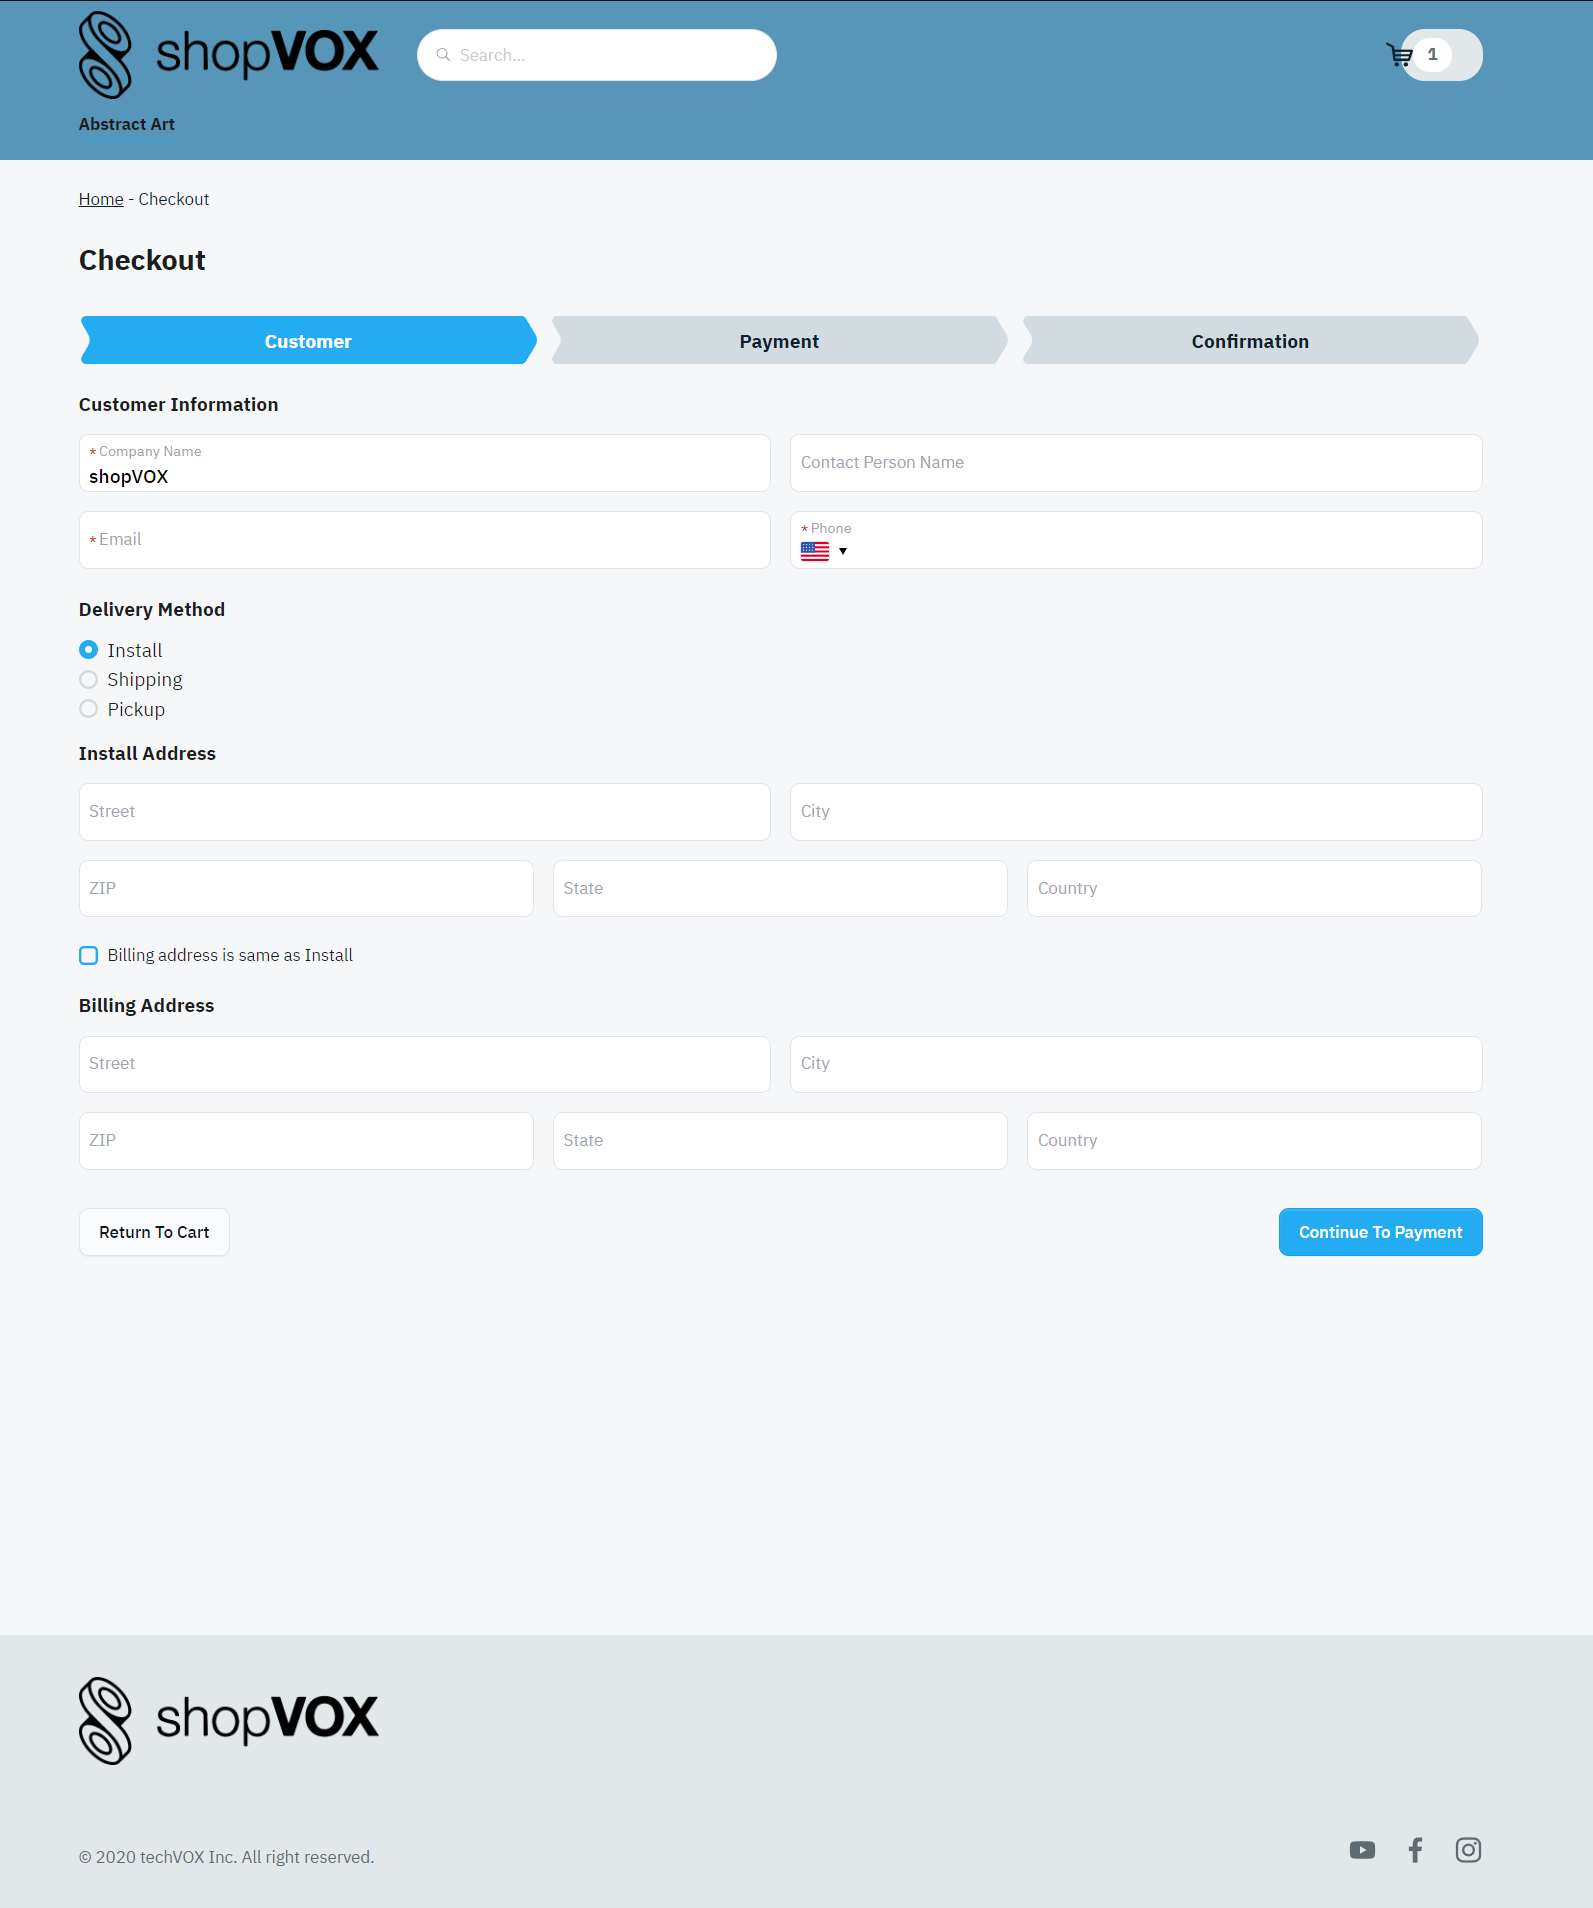
Clicking "Continue to Payment" will bring a customer to the Checkout Page where they will have to enter in the information to process the order
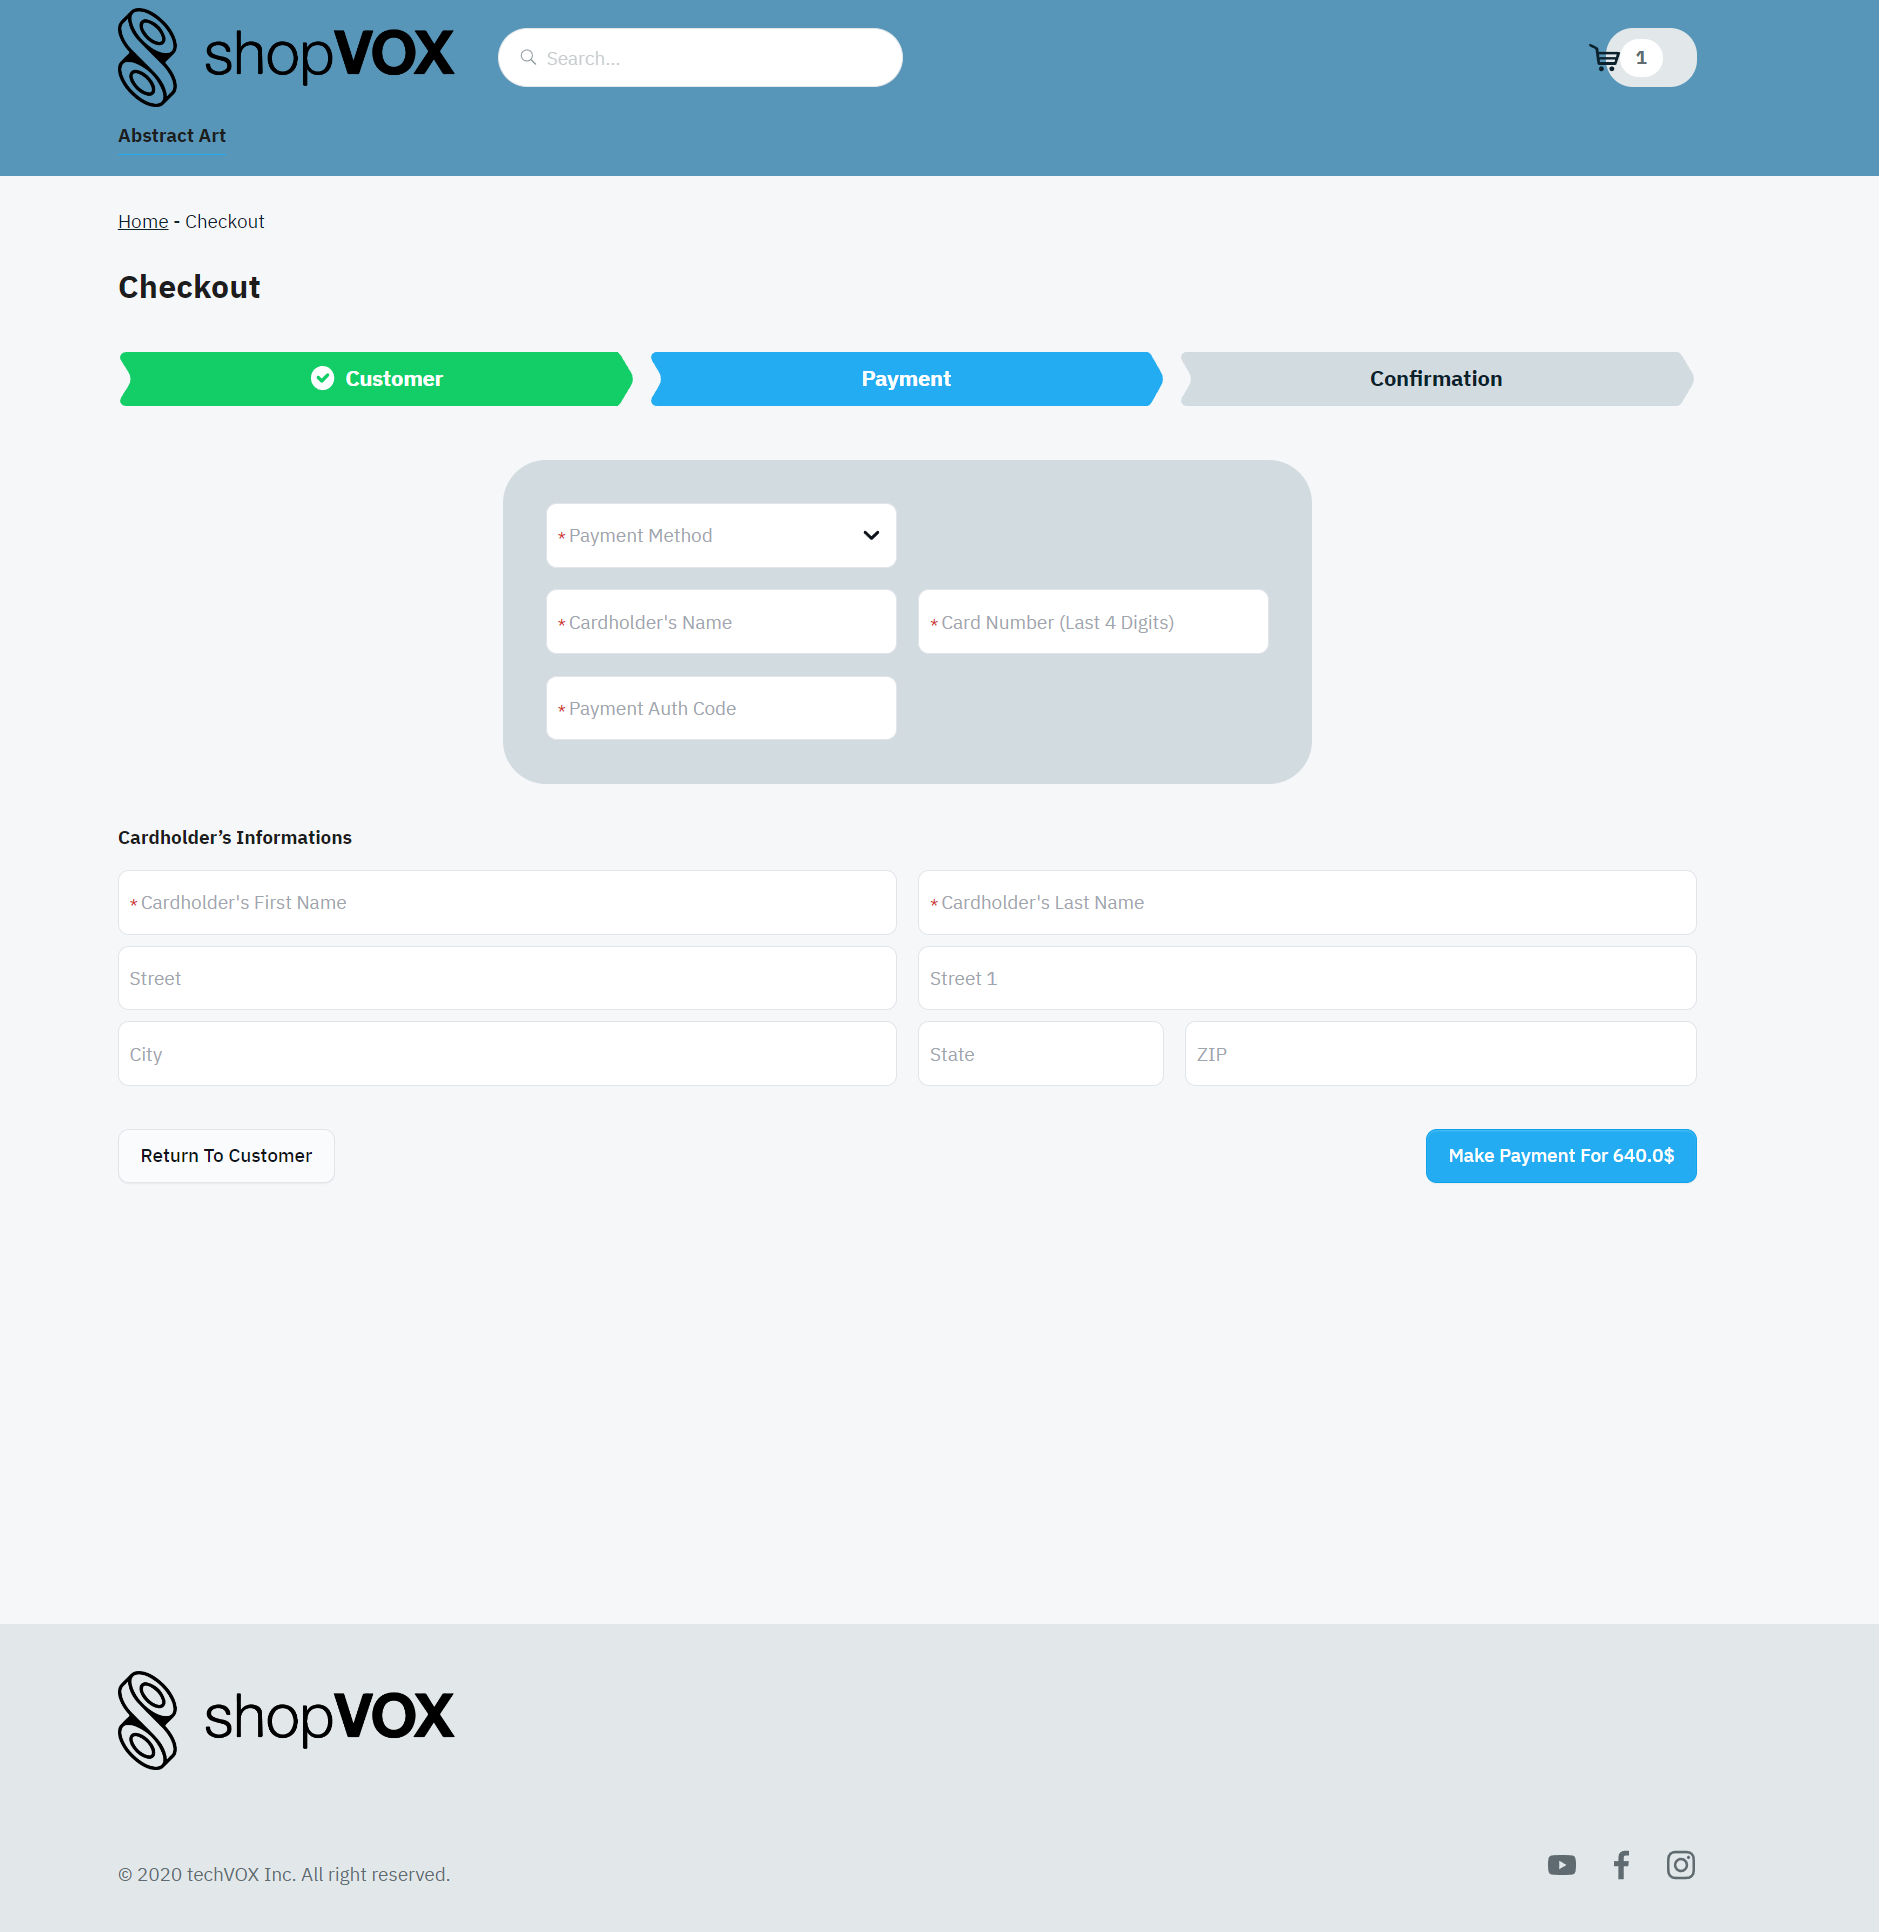
Next enter the Payment Information
After all the Payment Details are filled in, select Make Payment, then continue to confirmation
Adjust Productspositionin shopping cart
It is easy to adjust the order of your products in shopping cart.
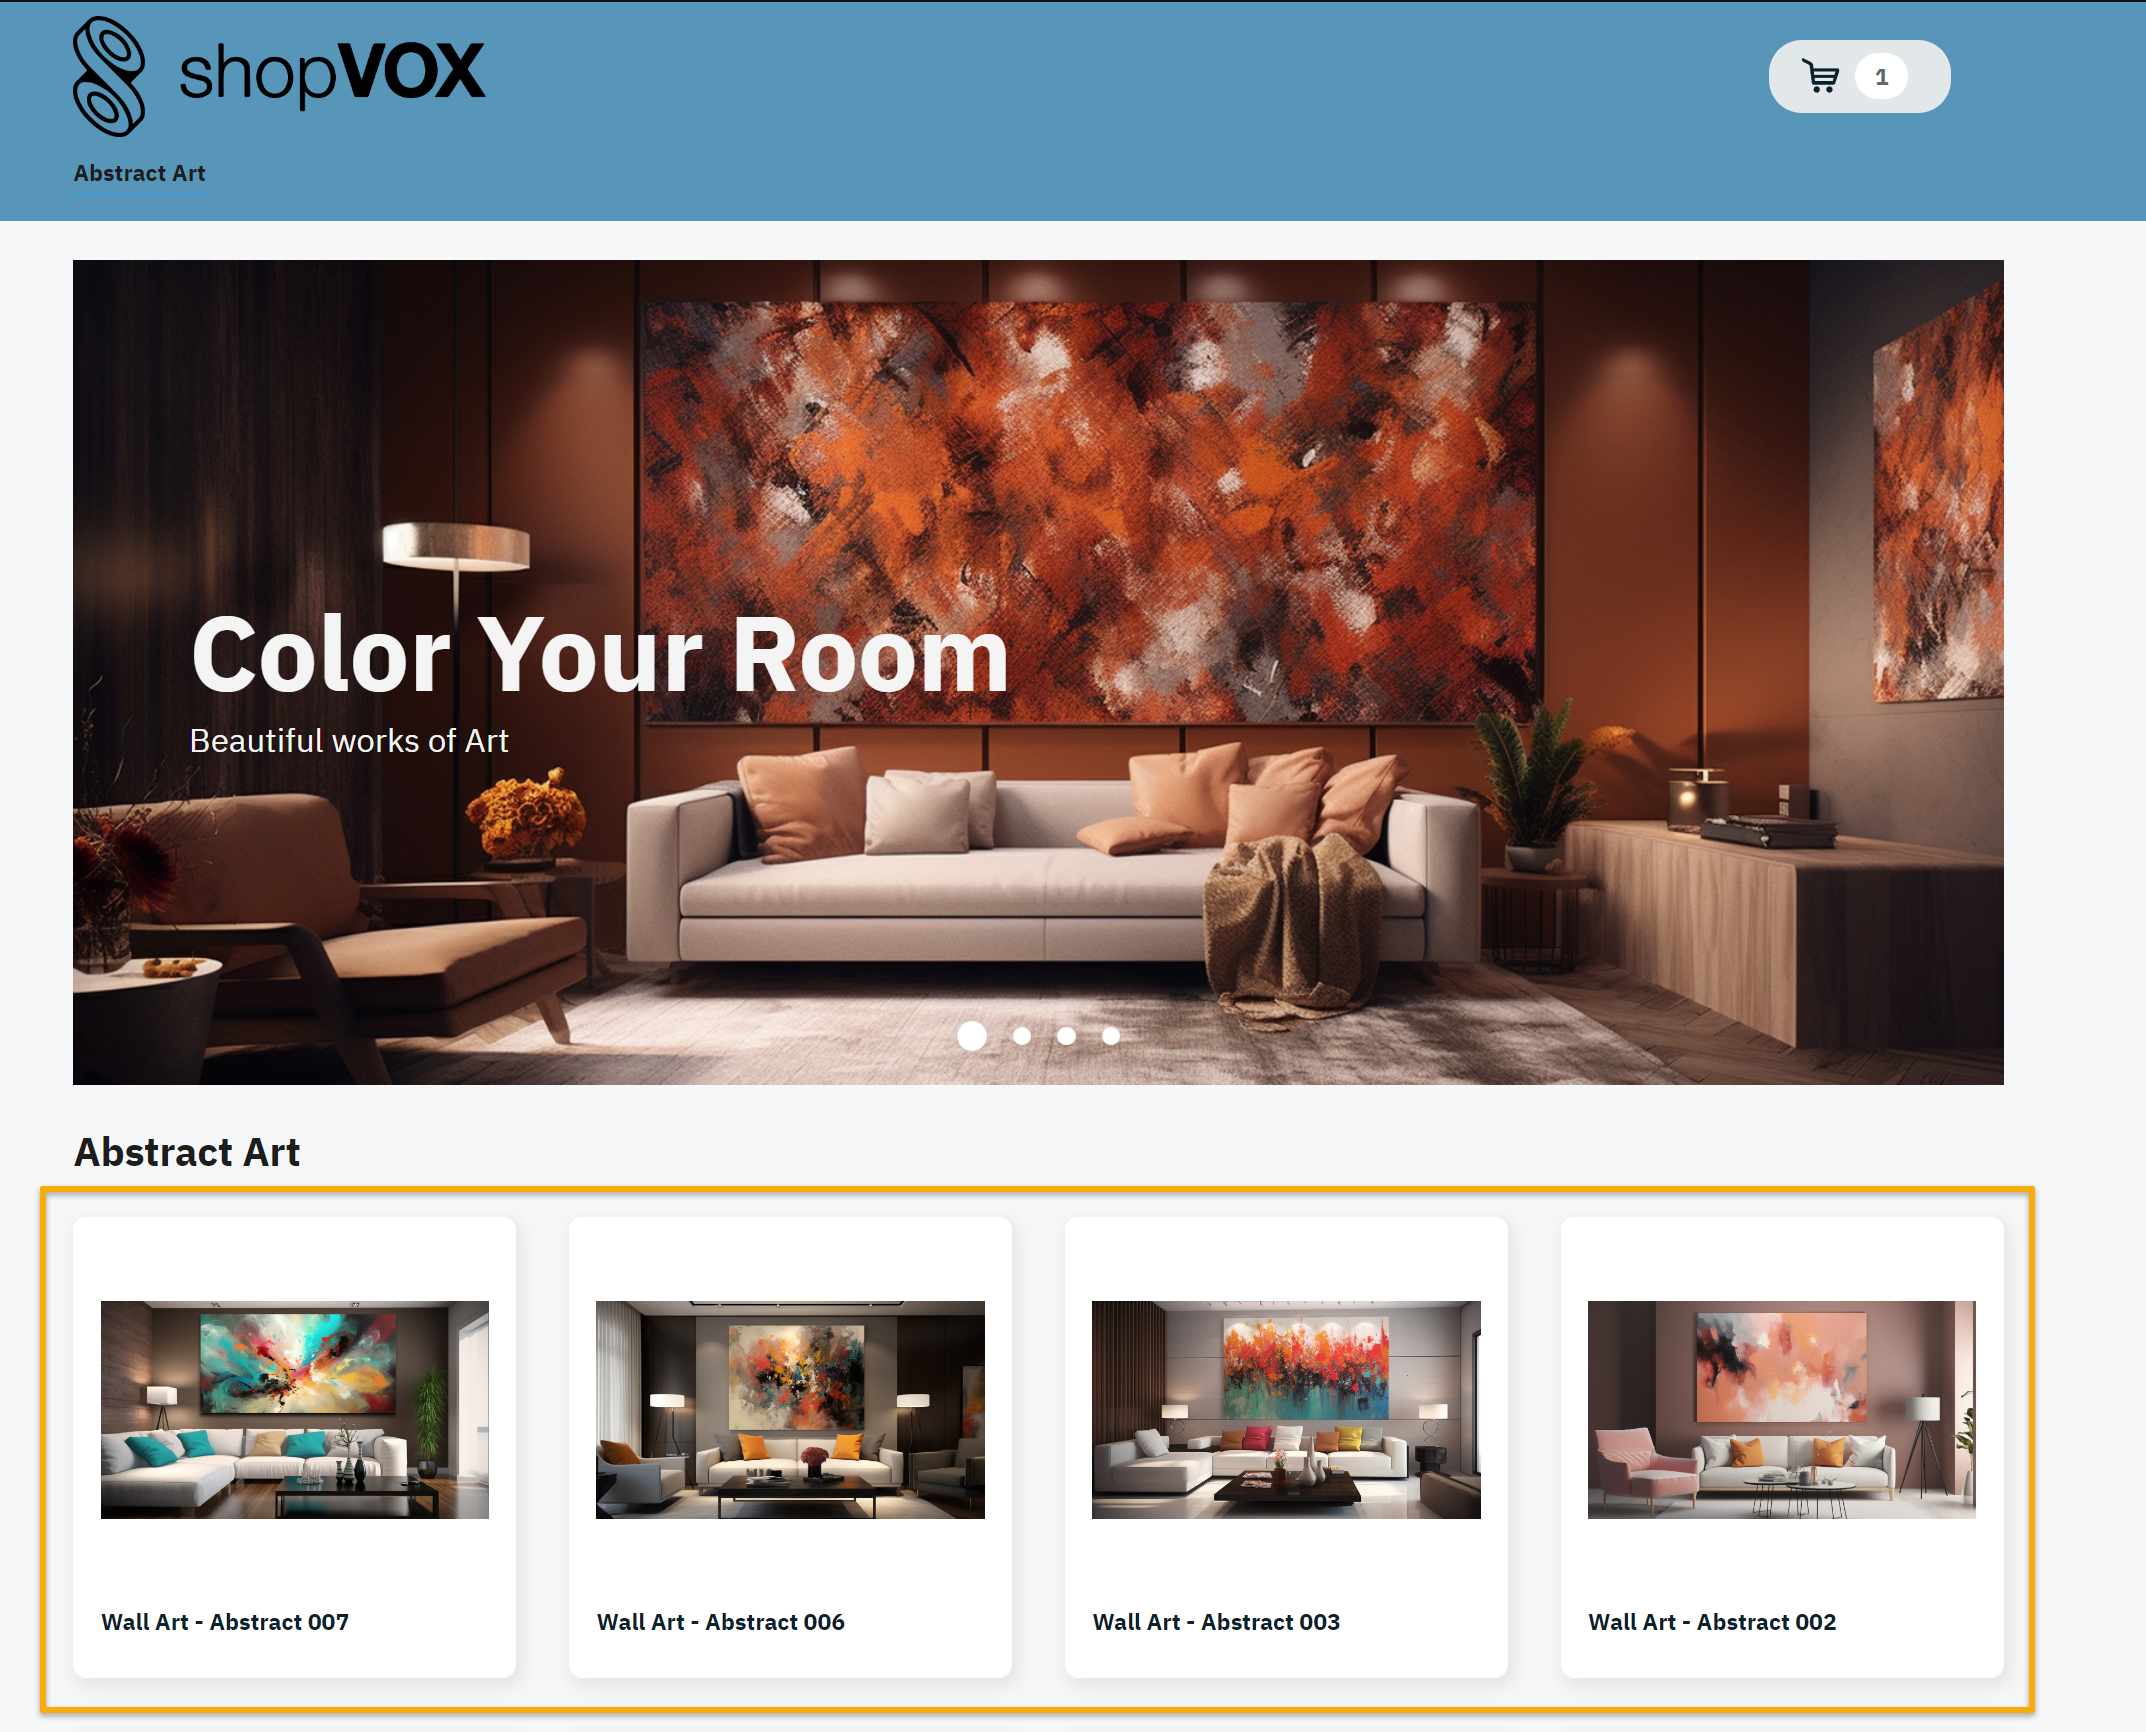
See this image.Notice how the products are in a specified order 7,6,3,2
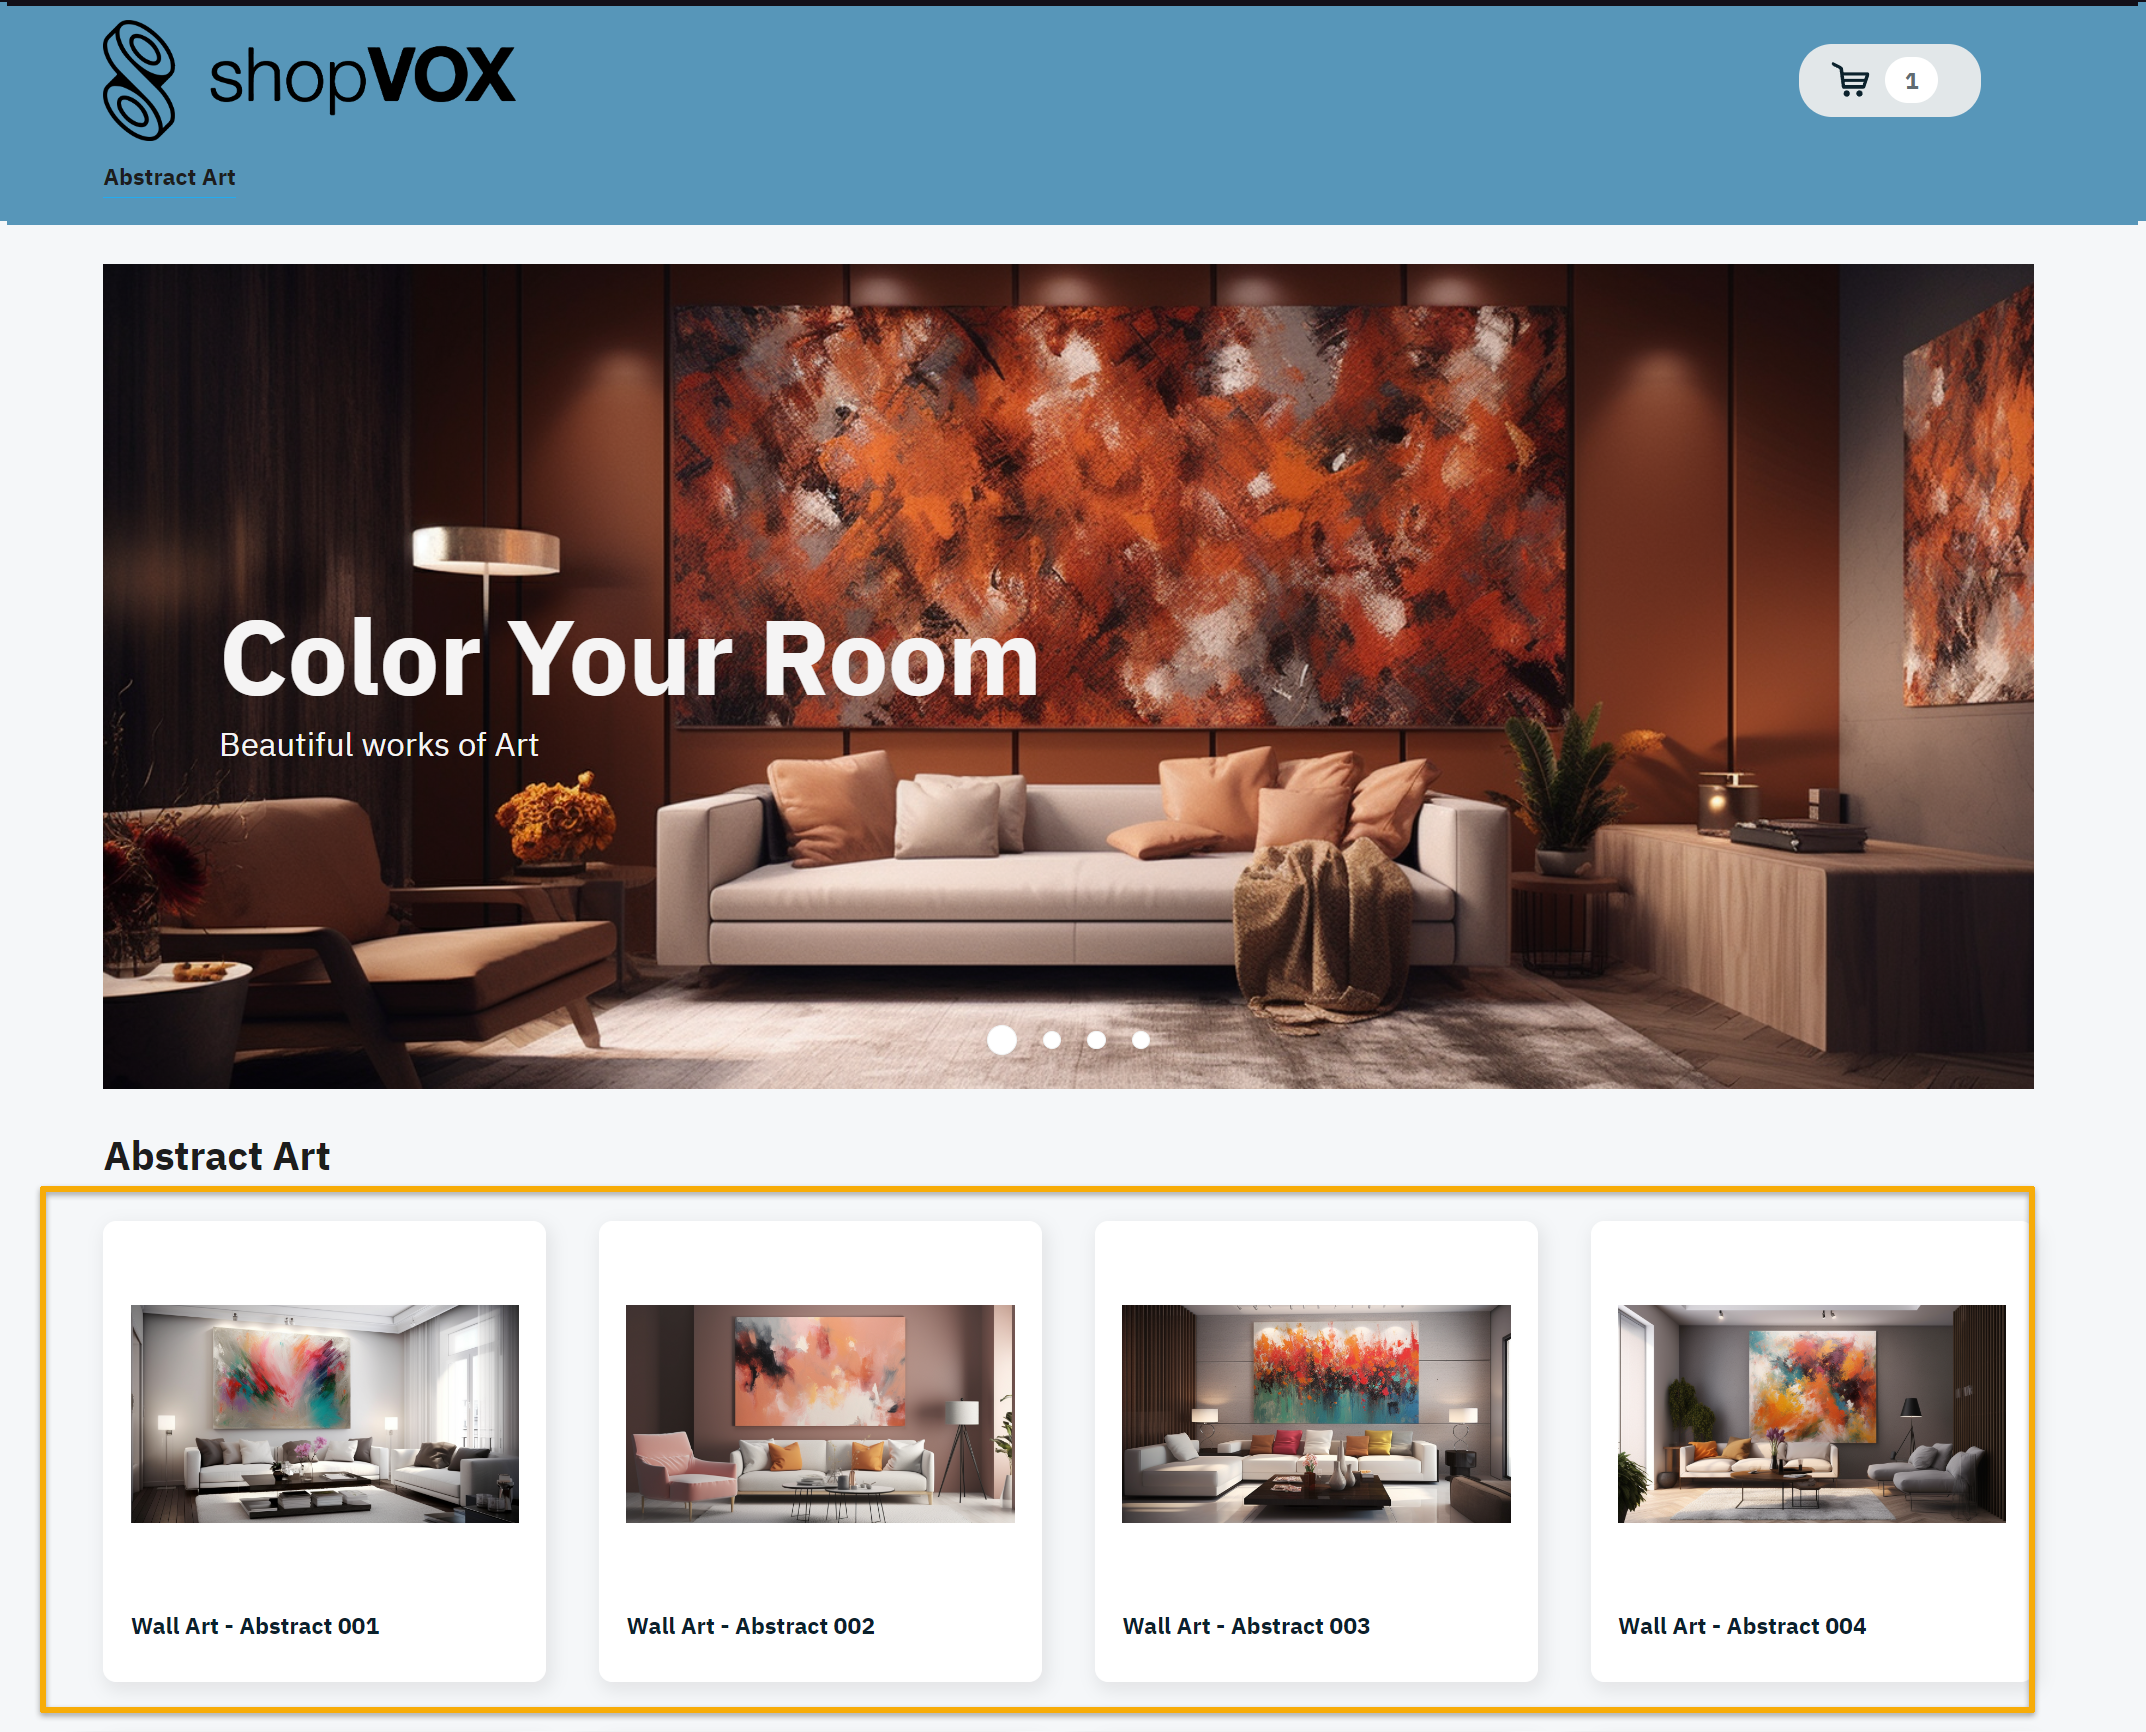
To rearrange products, into the order you wish. From the Ecommerce tab, click on Products, and drag and drop your products from the right hand side into any order you desire. For this example we will put back into order 1,2,3,4,5,6,7,8
When you click on Preview, you will see the products in the new order.
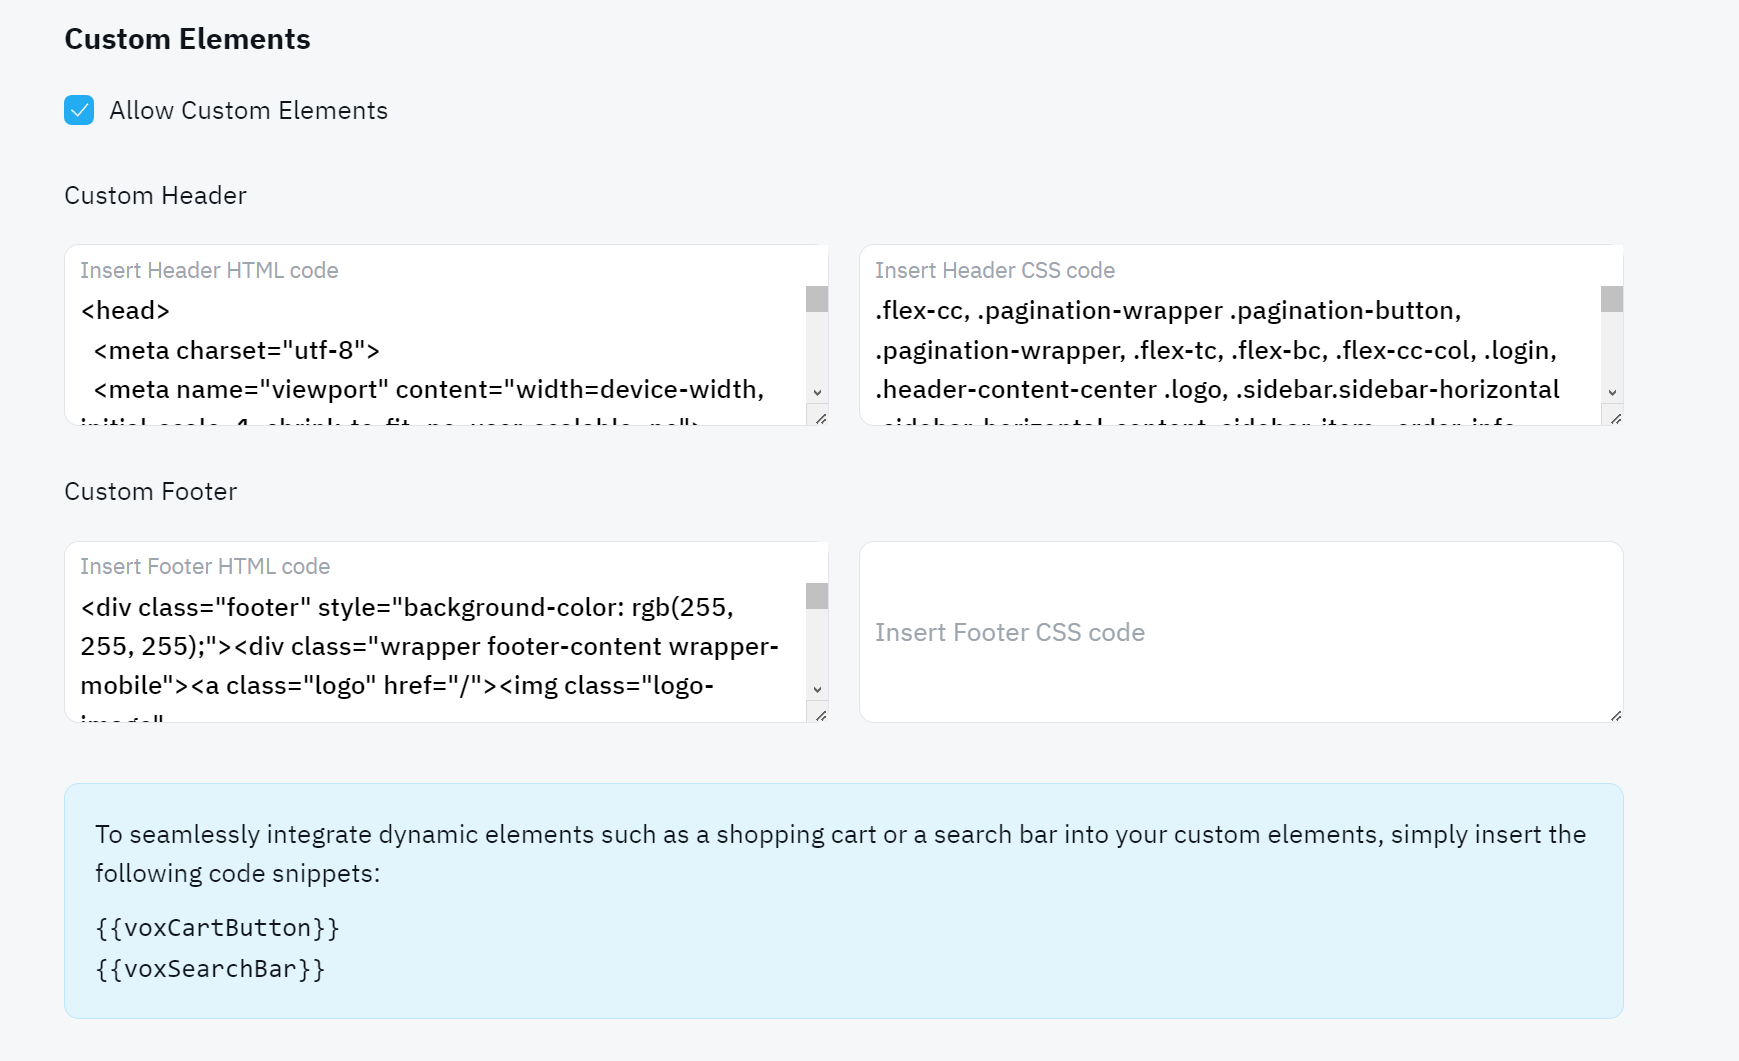
Custom Elements
With shopping cart you have the option to add in your own code snippets. You can click "Allow Custom Elements"
After clicking you will see Custom Header and Foot HTML and CSS Code
These fields will be blank and we advise you consult your Web developer to copy the code content from your existing website.
NOTE: Below is an example of what the code might look like. This should be similiar to the Header and Footer code you have written for your current website.
You can experiment with your own Header and Footer HTML and CSS.
To seamlessly integrate dynamic elements such as a shopping cart or a search bar into your custom elements, simply insert the following code snippets
 Updated
by Tyler MacDonald
Updated
by Tyler MacDonald
 Be aware! Use only lowercase letters with no spaces for your slug. Anything other than that will result in an error
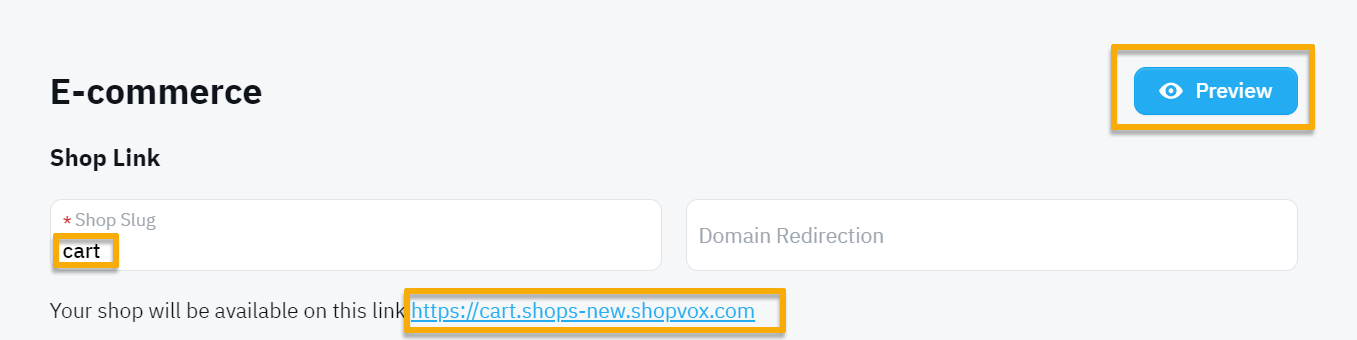
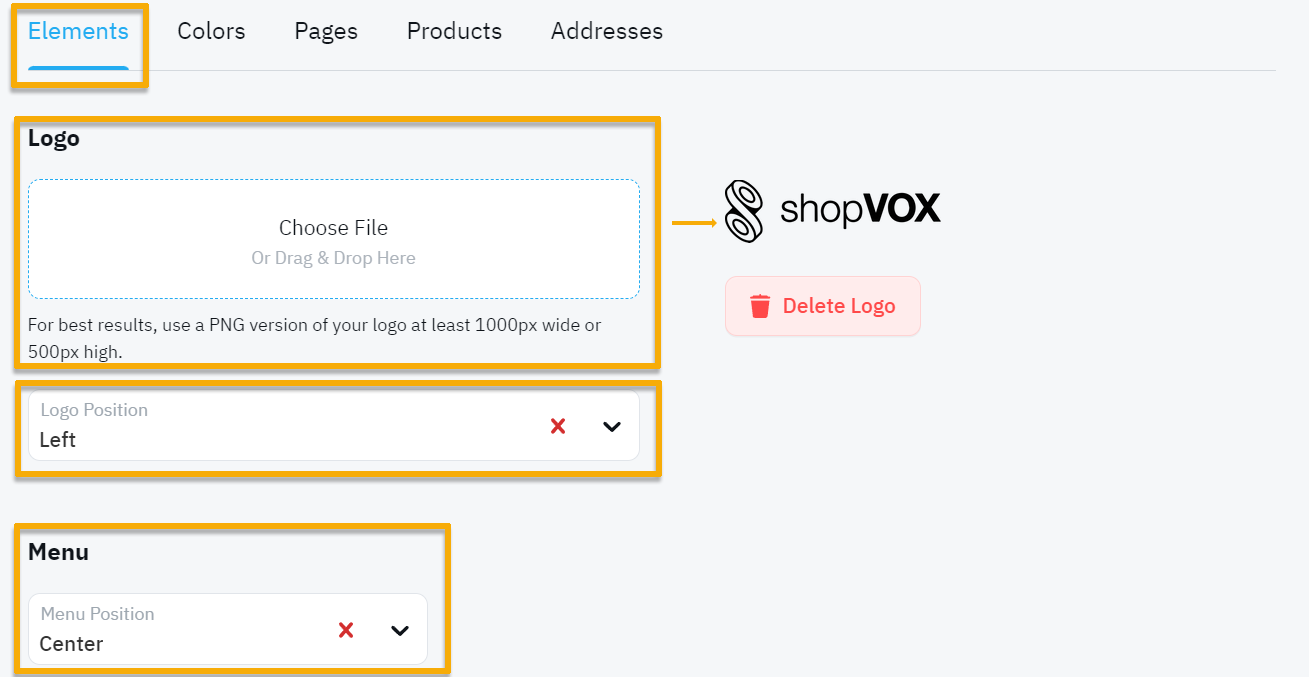 Note for this example we are leaving all the settings as is but will be uploading the shopVOX logo
 A Banner is the classic Image and text you see on most websites at the top of the page, underneath the header, that helps identify what your brand is. Selecting flattering images, and provide simple text to your customers
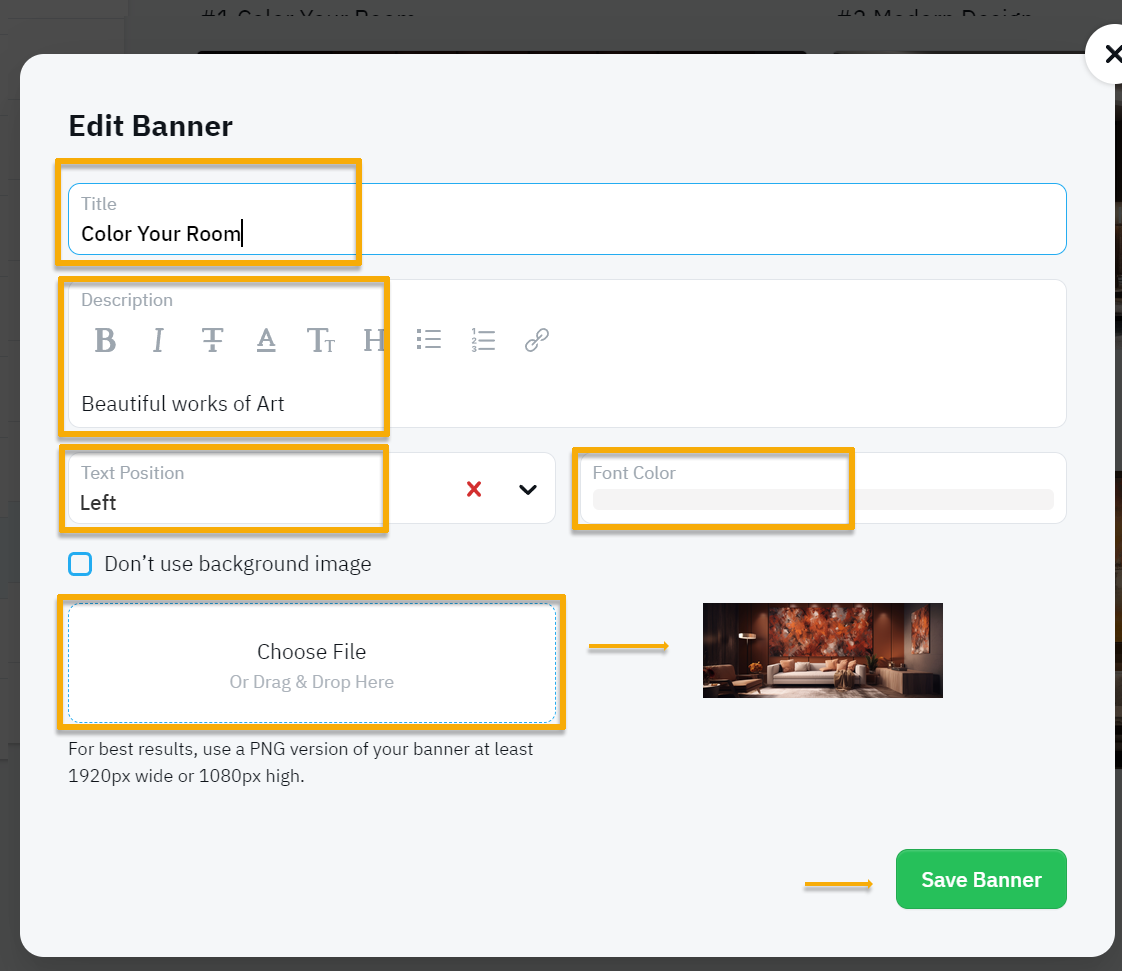 Add in a few images for variety. Its best practice to keep it simple. Less is more, and a good image speaks volumes.
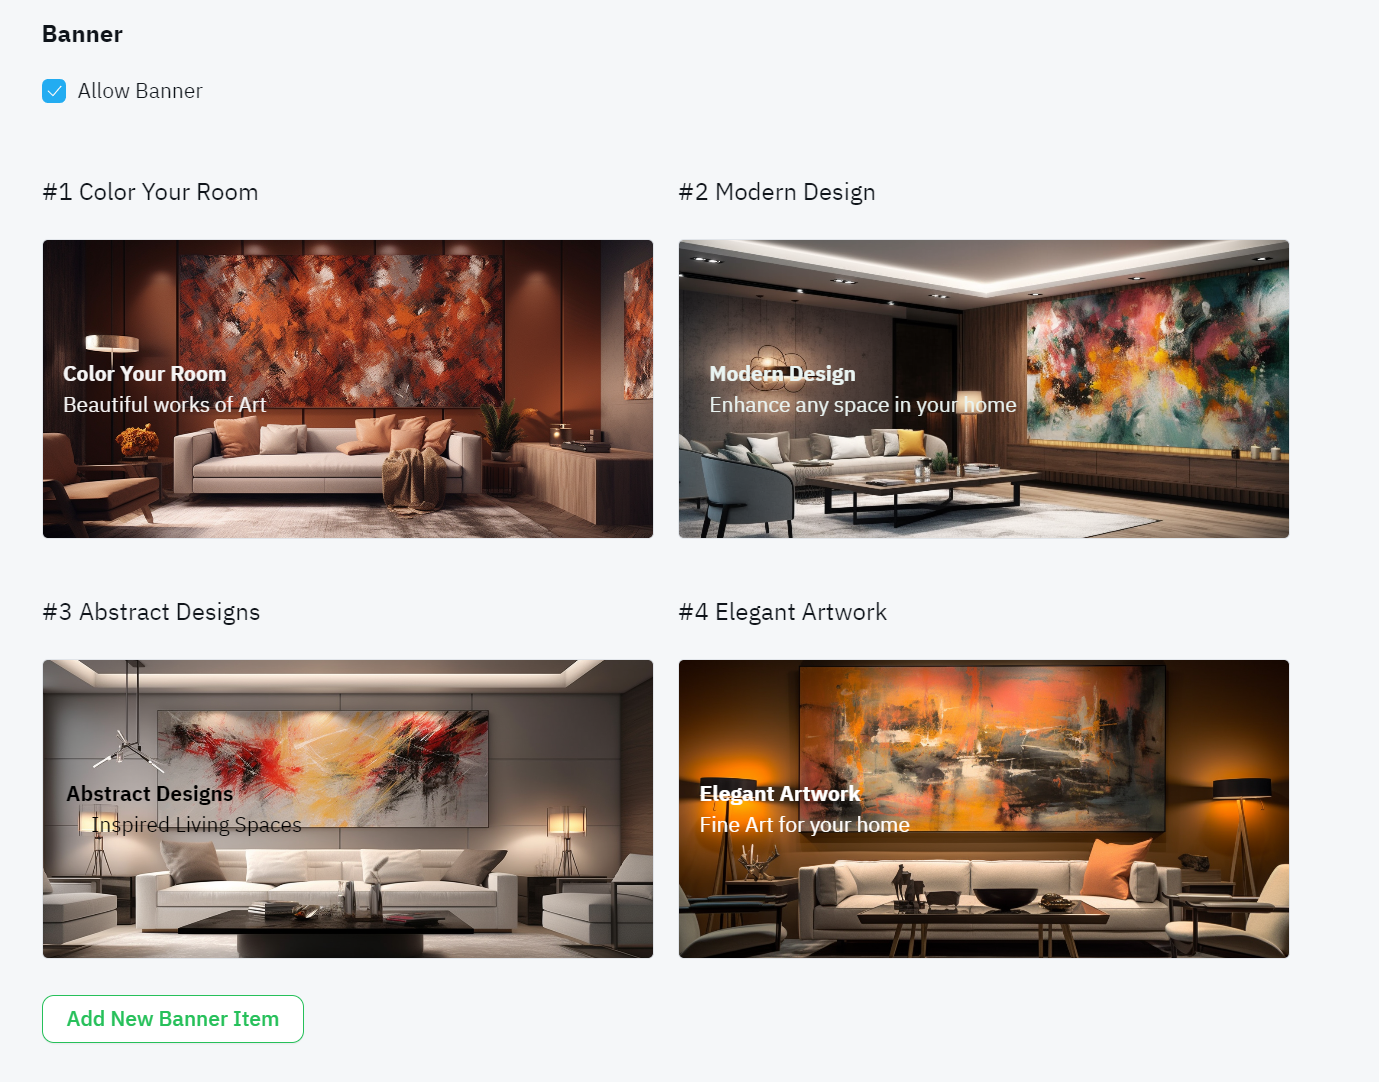 Please note, that the previews are not the exact representation of what you will see on screen. This is because the shopping cart is responsive and will adjust for different screen sizes and devices.
 Your social media links, will show up on the bottom right of the footer on the shopping cart page.
 Remember when you make changes to the shopping cart, to click "Save Ecommerce Settings" before you Click the blue Preview button
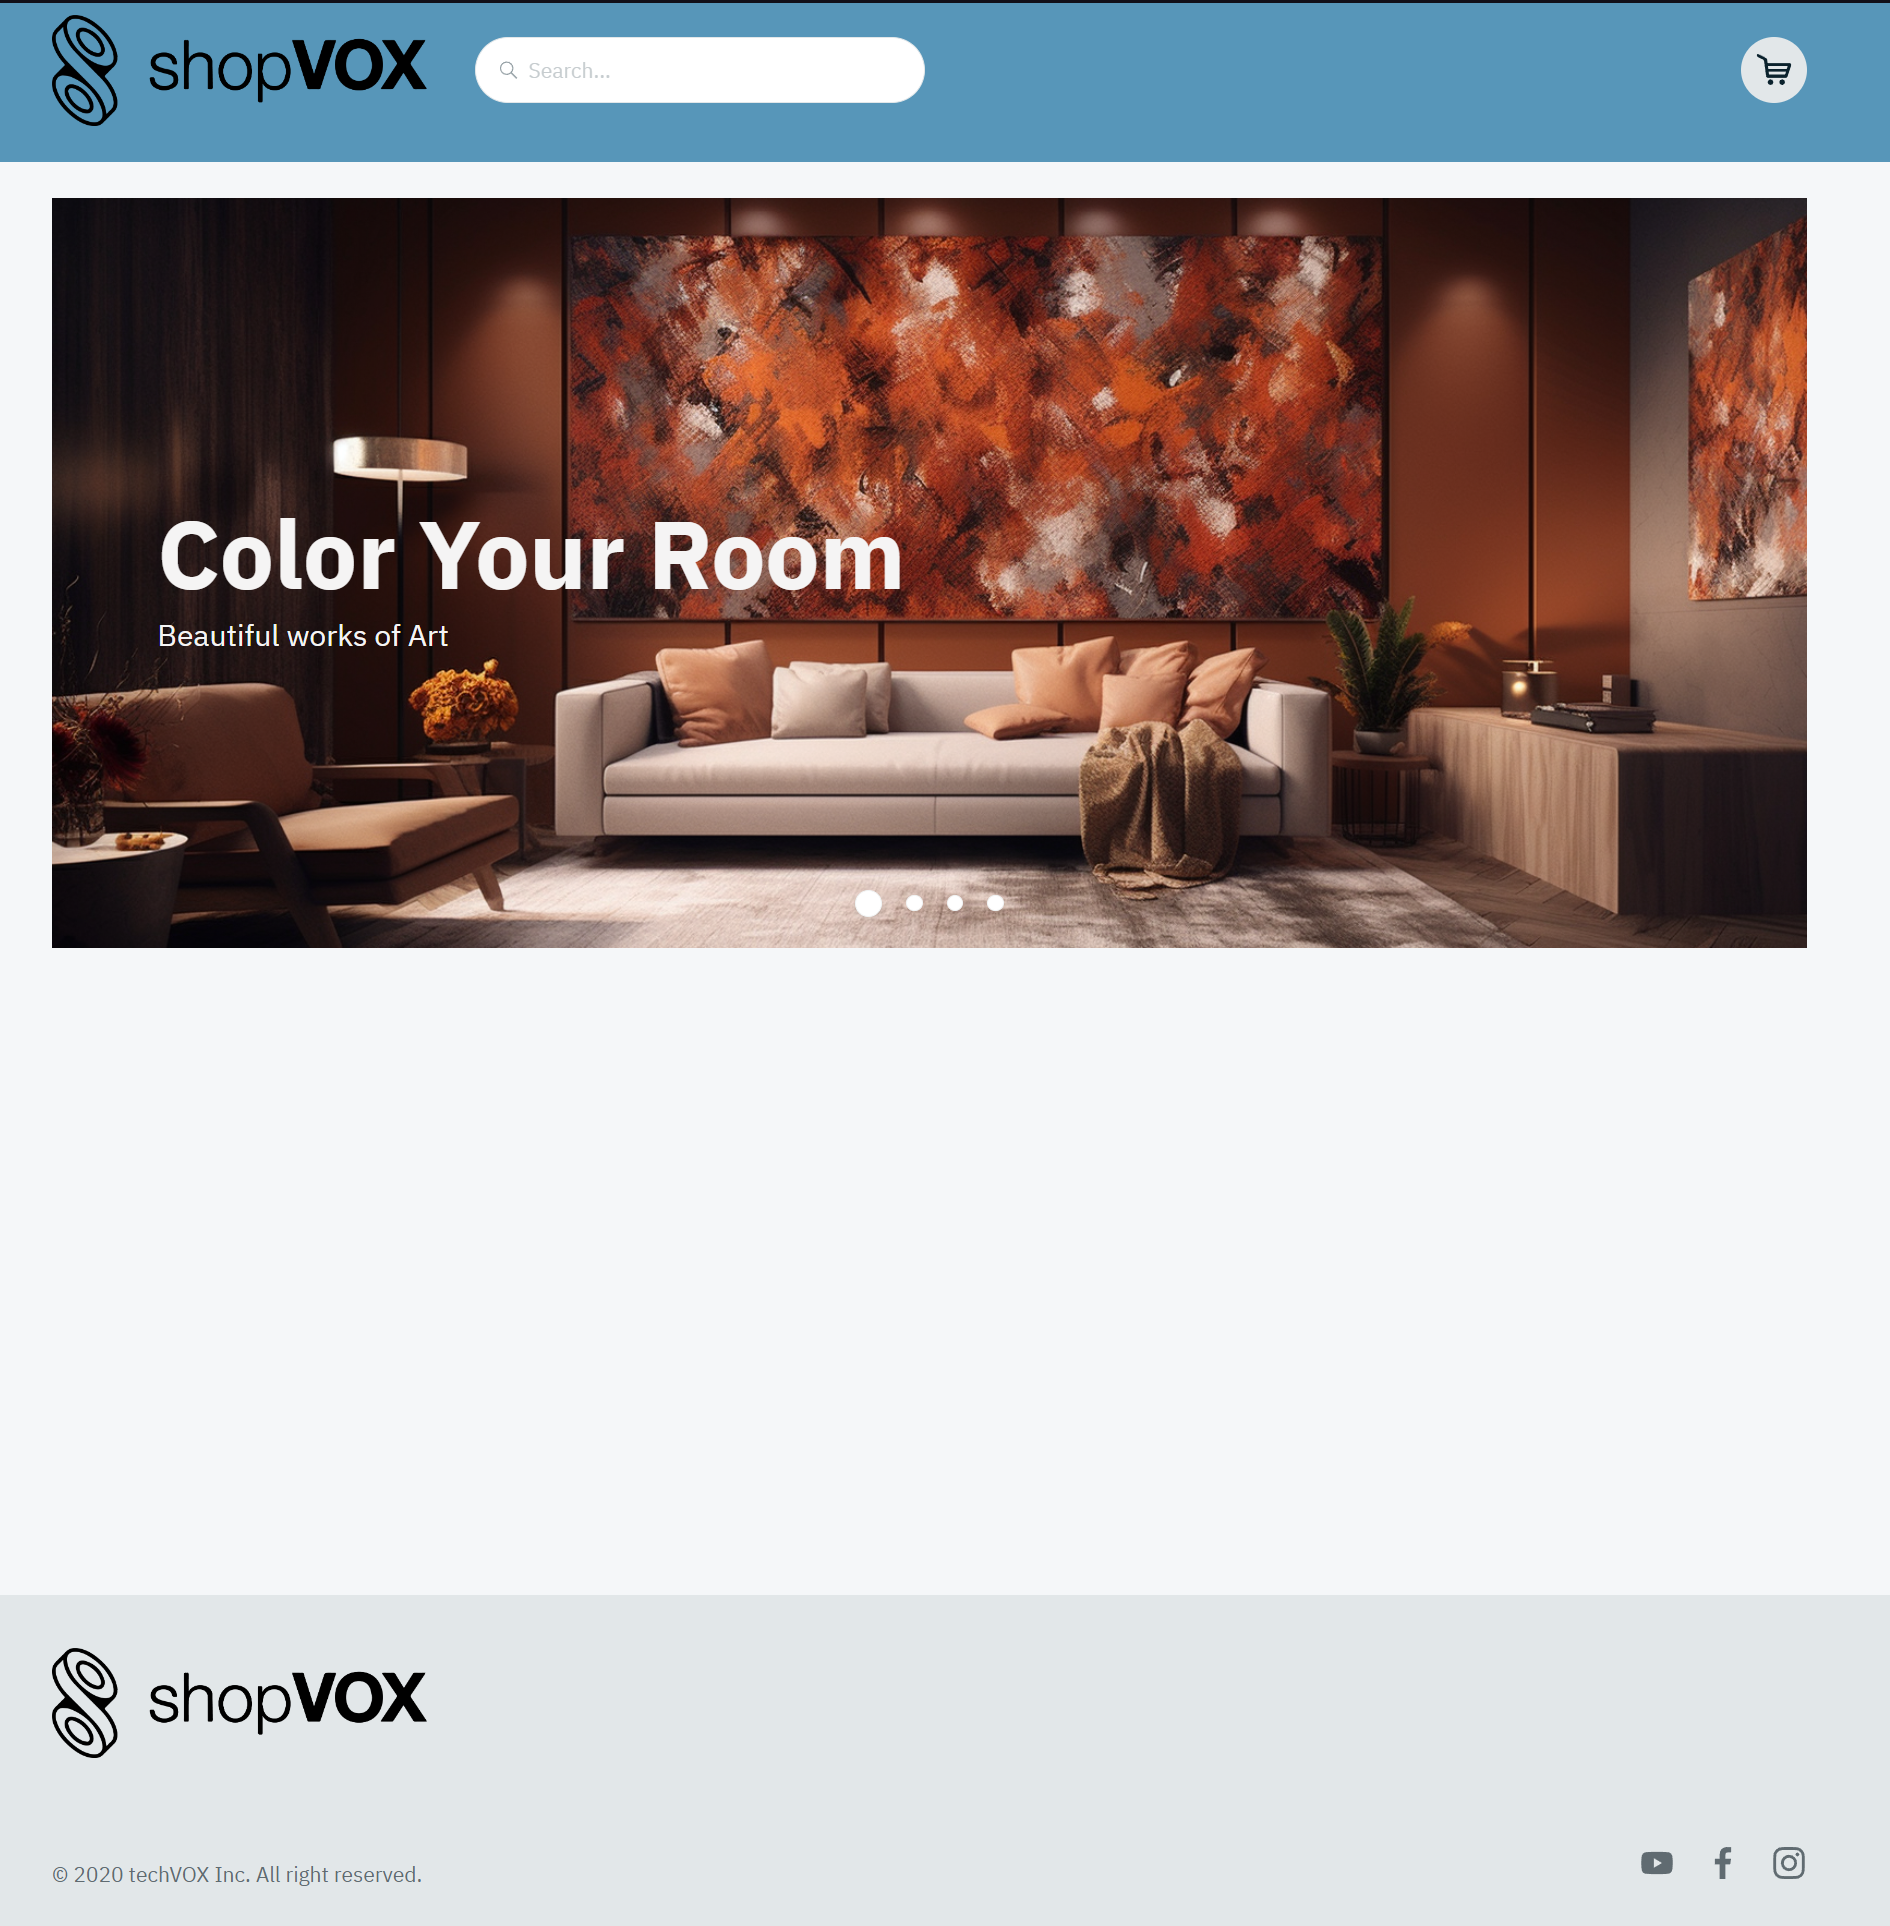 Make changes, click "Save Ecommerce Settings" then the blue Preview button regularly to see the final output of your configuration
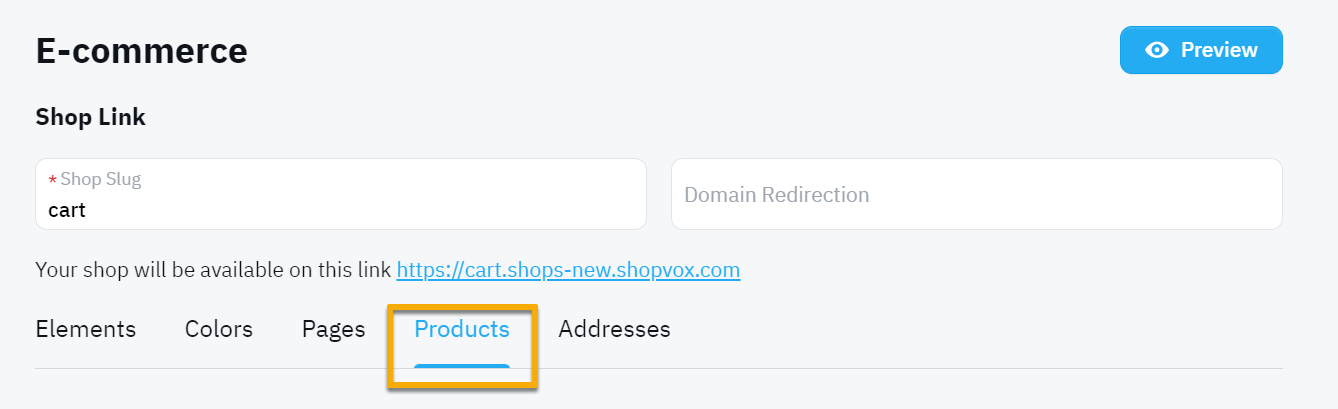

 Note: Adding a product to the Shopping Cart will automatically set the shopping cart flag within the Product itself.
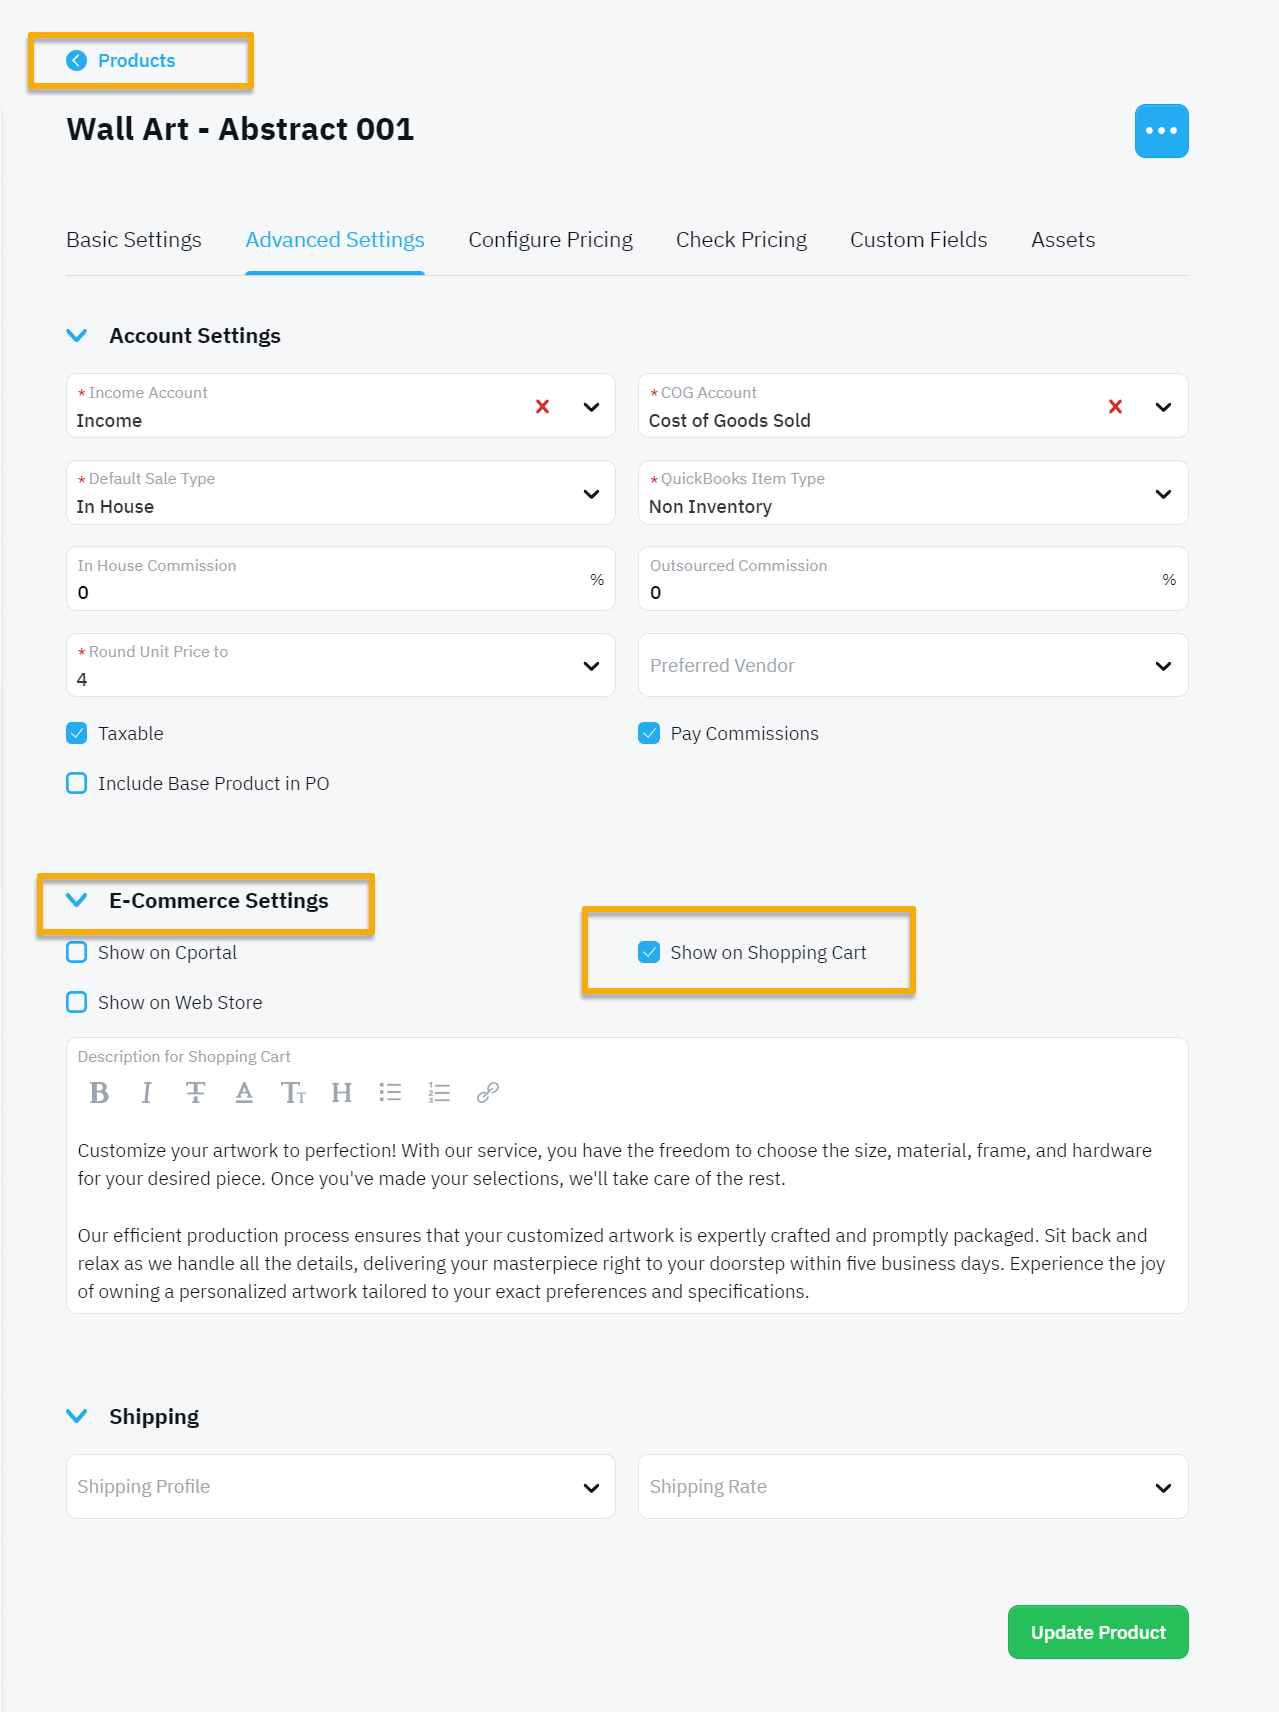
 With a clean responsive design, you can create beautiful looking Shopping Carts
 After all the Payment Details are filled in, select Make Payment, then continue to confirmation